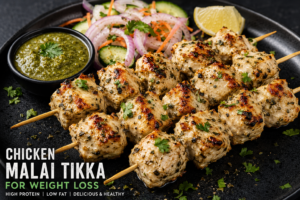
Healthy Chicken Malai Tikka for Weight Loss (High-Protein Recipe) Recipe

This healthy Chicken Malai Tikka is rich in protein and made with low-fat Greek yogurt and less oil. This high-protein dish is perfect for fat loss and helps keep you fuller for a longer period.

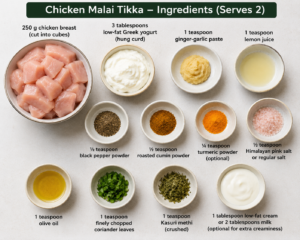
Ingredients (Serves 2)

250 g Chicken breast (cut into cubes)

3 Tbsp Low-fat Greek yogurt (hung curd)

1 tsp Ginger-garlic paste

1 tsp Lemon juice

½ tsp Black pepper powder

½ tsp Roasted cumin powder

¼ tsp Turmeric powder (optional)

½ tsp Himalayan pink salt or regular salt

1 tsp Olive oil

1 tsp Finely chopped coriander leaves

1 tsp Kasuri methi (crushed)

1 Tbsp Low-fat cream or 2 Tbsp milk (optional to add extra creaminess)

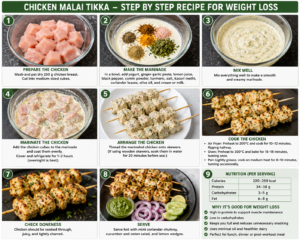
Instructions

1.Prep the chicken:

  • Wash and pat dry the chicken breast using paper towels.
  • Cut the chicken into cubes.

2.Marinade preparation:

In a mixing bowl, add the following ingredients:

  • Low-fat Greek yogurt
  • Ginger-garlic paste
  • Lemon juice
  • Black pepper powder
  • Roasted cumin powder
  • Salt
  • Kasuri methi
  • Coriander leaves
  • Olive oil
  • Low-fat cream or milk (optional)

Mix the marinade well.

3.Marinate the chicken cubes:

  • Add the chicken cubes to the marinade.
  • Mix the chicken cubes well with the marinade to ensure every piece is coated in the mixture.
  • Cover the bowl with plastic wrap and store it in the refrigerator for 1-2 hours or overnight.

4.Skewer the chicken pieces:

  • Skewer the chicken cubes.
  • If you are using wooden skewers, soak them in water for 20 minutes.

5.Cooking your Chicken Malai Tikka:

Air fryer

  • Preheat the air fryer to 200 degrees Celsius.
  • Cook the chicken skewers for 1012 minutes.
  • Halfway through the cooking time, gently flip the skewers over.

Oven

  • Preheat the oven to 200 degrees Celsius.
  • Place the skewers on a baking sheet.
  • Bake the chicken skewers for 1518 minutes.
  • Flip the chicken skewers halfway through the cooking time.

Non-stick pan

  • Grease a non-stick pan with a couple of drops of olive oil.
  • Cook the skewers for 8-10 minutes over medium heat.
  • Turn the skewers occasionally until they are done.

6.Serving suggestions:

  • Serve Chicken Malai Tikka with mint coriander chutney (without sugar).
  • Accompany it with a cucumber and onion salad.
  • Squeeze some lemon wedges over the top.

Weight loss benefits

Chicken Malai Tikka is made with highquality protein and low carbohydrates. The dish is healthy, as it uses less oil and Greek yogurt. Thus, it helps promote weight loss, reduces cravings, and increases the feeling of fullness after eating. This recipe is perfect for lunch, dinner, or after a workout.


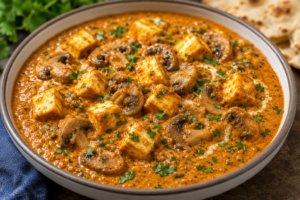
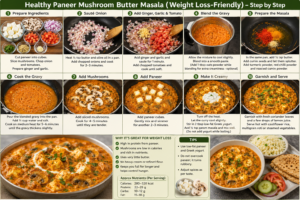
Healthy Paneer Mushroom Butter Masala (Weight Loss) 

This healthy paneer mushroom butter masala is loaded with proteins and low in calories. It is a lighter version of the restaurant-style butter masala prepared with less butter and no heavy cream.

Preparation Time 

Prep Time: 10 mins

Cook Time: 20 mins

Servings: 2

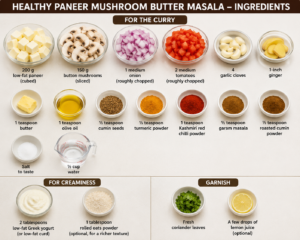
Ingredients 

For the Curries:

  • 200 gms Paneer (low fat), cubed
  • 150 gms mushrooms (button), sliced
  • 1 medium onion, roughly chopped
  • 2 medium tomatoes, roughly chopped
  • 4 garlic cloves
  • 1 ginger
  • 1 tsp butter
  • 1 tsp olive oil
  • ½ tsp cumin seeds
  • ½ tsp turmeric powder
  • 1 tsp Kashmiri red chilli powder
  • ½ tsp garam masala
  • ½ tsp roasted cumin powder
  • Salt to taste
  • ½ cup water

For the Creaminess:

  • 2 tbsp low fat Greek yogurt or curd
  • 1 tbsp rolled oats powder (optional, to make it more thick)

Garnish:

  • Fresh coriander leaves
  • A few drops of lemon juice (optional)

Step by Step Recipe:

1. Prep the veggies:

Wash the mushrooms and cut them into slices. Cut paneer into cubes. Chop onions and tomatoes. Peel garlic and ginger.

2. Cook the base:

Take ½ tsp butter and olive oil in a pan. Add chopped onions and sautée for 23 mins. Add ginger and garlic and sautée for a minute. Add chopped tomatoes and cook.

3. Blend the gravy:

Allow the mixture to cool a bit. Blend it into a smooth paste using a mixer grinder. Add oats powder (if using) and blend again to thicken the consistency.

4. Prepare masala:

Heat the remaining ½ tsp butter in the same pan. Add cumin seeds and let it splutter. Add turmeric, chilli powder, and roasted cumin powder. Stir for a few seconds.

5. Cook the gravy:

Add the blended mixture to the pan and mix well. Add ½ cup water and salt. Cook on medium heat for 56 mins till it reaches a thick gravy consistency.

  1. Add paneer and mushrooms:

Add the sliced mushrooms to the pan and cook for 45 mins. Add the cubed paneer to the pan and mix well. Let it simmer for 2-3 mins.

7. Make it creamy:

Switch off the stove and let the curry cool down a bit. Add low fat Greek yogurt and garam masala. Mix well. Do not add the yogurt when the curry is cooking, otherwise, it will curdle.

8. Garnish and serve:

Garnish with coriander leaves and a few drops of lemon juice. Pair it with:

  • Cauliflower rice
  • Multigrain roti
  • High protein chapati
  • Steamed vegetables

Weight Loss Benefits:

It is a healthy version of paneer butter masala. It is high in proteins due to low-fat paneer and mushrooms which are also low in calories and high in nutrition. It uses minimal butter, no cream, or refined wheat flour for thickening. It keeps you full for longer and reduces cravings. It is good for a healthy weight loss diet as it allows you to have paneer dish with minimal calories.

This healthy paneer mushroom butter masala is the perfect recipe for all those who love paneer dishes and want to have the same butter masala taste without adding many calories to their diet.


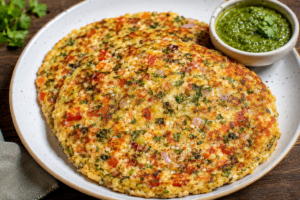
Healthy High-Protein Paneer Kasuri Methi Chilla (Weight Loss Friendly)

This healthy Paneer Kasuri Methi Chilla is very tasty, satisfying, high in fiber and protein. The psyllium husk or isabgol makes this chilla binding, light on the stomach and perfect for weight loss. It is a healthy breakfast or evening snack option that keeps you full for long.

Preparation Time:

 Prep Time: 10 mins

Cooking Time: 10 mins

Serves: 2.

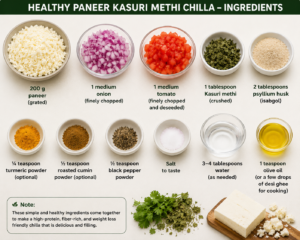
Ingredients

  • 200 g paneer (grated)
  • 1 medium onion (finely chopped)
  • 1 medium tomato (finely chopped and deseeded)
  • 1 tablespoon kasuri methi (crushed)
  • 2 tablespoons psyllium husk or isabgol
  • ¼ teaspoon turmeric powder (optional)
  • ½ teaspoon roasted cumin powder (optional)
  • ½ teaspoon black pepper powder
  • Salt to taste
  • 3-4 tablespoons water (as needed)
  • 1 teaspoon olive oil or a few drops of desi ghee for cooking

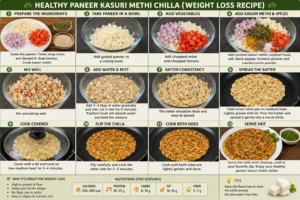
Instructions

Step 1: Preparing the ingredients

Take a large bowl and add the grated paneer.

Finely chop the onion.

Take the deseeded tomato and finely chop it.

Crush the kasuri methi between palms.

Step 2: Making the chilla batter

To the bowl with paneer add in chopped onion, chopped tomato, kasuri methi, psyllium husk or isabgol, salt, black pepper powder, turmeric powder (if using), roasted cumin powder (if using).

Mix well.

Step 3: Adding water

Add 34 tablespoons of water and mix well to make a thick batter like consistency.

Let the mixture rest for 5 minutes.

The isabgol will soak the water and will make the mixture bind together.

Step 4: Making the chilla

Heat a non-stick pan on medium flame and grease it with olive oil or desi ghee.

Take the mixture and drop it into the pan. With the back of a spoon gently press the mixture into an oval or round shape of a chilla making sure that it is about ½ cm thick so that it does not break while cooking.

Step 5: Cooking the chilla

Cover the pan with a lid and let it cook for 34 minutes on medium-low flame.

Gently flip it over and cook the other side for another 23 minutes or until lightly golden.

Step 6: Serving the chilla

Serve the healthy paneer kasuri methi chilla with mint and coriander chutney, low-fat greek yogurt dip and a fresh cucumber salad.

Why this recipe is healthy for weight loss:

  • Protein-rich paneer helps in feeling full for long
  • High fiber psyllium husk or isabgol also helps in keeping you full for long
  • No refined carbs and no wheat flour
  • Quick and healthy recipe
  • Perfect as breakfast, lunch or evening snack.


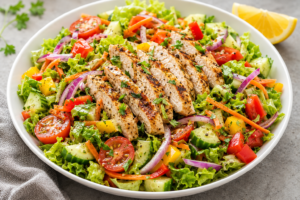
Healthy Weight Loss Chicken Salad (High-Protein & Low-Calorie)

Healthy Weight Loss Chicken Salad is a healthy recipe made of high-proteinhigh-fiber, vitamins, and healthy fats to keep you full for a long time. This is a perfect option for lunch or dinner when you are on a weight loss journey but still want to enjoy your meal.

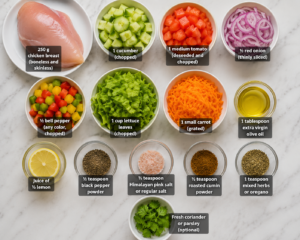
Healthy Weight Loss Chicken Salad (High-Protein & Low-Calorie) Ingredients:

 250 g chicken breast (without bones and skin)

 1 cucumber (chopped)

 1 tomato (deseeded and chopped)

 ½ red onion (thinly sliced)

 ½ bell pepper (chopped)

 1 cup lettuce leaves (chopped)

 1 small carrot (grated)

 1 tablespoon extra virgin olive oil

 juice of ½ lemon

 ½ teaspoon of black pepper powder

 ½ teaspoon of himalayan pink salt or regular salt

 ½ teaspoon of roasted cumin powder

 1 teaspoon of mixed herbs or oregano

 optional – fresh coriander or parsley

Healthy Weight Loss Chicken Salad (High-Protein & Low-Calorie) Directions:

1How to cook chicken:

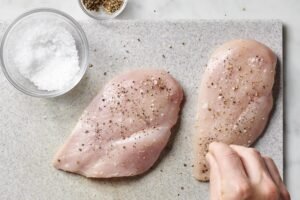
  • Wash the chicken breast and pat dry with a paper towel.
  • Season it with salt, black pepper, and roasted cumin powder.
  • Grill or cook it on medium flame for 67 minutes on each side.
  • Once it is donetake it off the flame and let it rest for 5 minutes.
  • Thenslice it into small pieces.

2How to chop the veggies:

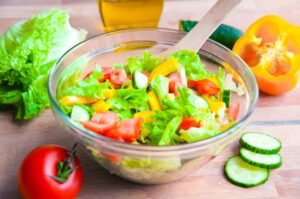
  • Wash all the veggies and chop the cucumber, tomato, lettuce leaves, and bell pepper.
  • Thinly slice the onion and grate the carrot.

3How to make the dressing:

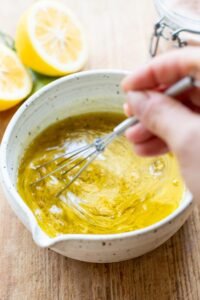
  • In a small bowl, whisk together lemon juice, olive oil, black pepper, salt, roasted cumin powder, and mixed herbs or oregano.

4How to make the salad:

  • In a big bowl, add chopped veggies and add the slices of grilled chicken.
  • Nowadd the dressing and toss to mix all the ingredients.

5How to serve:

  • Garnish with fresh coriander or parsley and enjoy this salad.

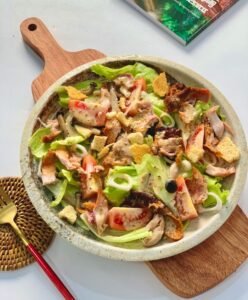
A fresh and healthy chicken and vegetable salad served on a wooden board, perfect for lunch or dinner.

Weight Loss Advantages

High in Protein to promote fat loss and prevent muscle loss

Low in calories and high in Fiber

It helps control appetite and reduce unhealthy snacking.

Good source of Vitamins and Minerals

Easy to prepare and it is very good to make meal planning and prepping.


High-Protein Weight Loss Idli (No Rice) – Soft, Tasty Healthy Breakfast (10 Mins Recipe)

Are you on a quest to find the right recipe for your healthy and filling breakfast to lose weight? This high-protein weight loss idli is made without rice and with simple ingredients, is tasty and fulfilling with good amount of protein and keeps you satiated for a long time. Moreover, this healthy breakfast recipe takes only 10 mins to make!

Why will you love this healthy no rice idli recipe?

  • No rice used
  • High in protein content
  • Soft and tasty
  • Prepares in 10 mins
  • Keeps you full for longer
  • Loses weight easily
  • Simple and easy to make with simple ingredients
  • Healthy Ingredients Required

Main Ingredients

  • 200 gm Paneer (room temperature)
  • 1 tbsp Curd (dahi)
  • 1 tsp Isabgol (psyllium)
  • Salt to taste
  • ½ tsp Desi ghee (to grease the idli mould)

Optional Addons

  • 1 tbsp Finely chopped onion
  • 1 tbsp Finely chopped tomato
  • 1 finely chopped green chili
  • A pinch of black pepper powder
  • A pinch of cumin powder or chat masala

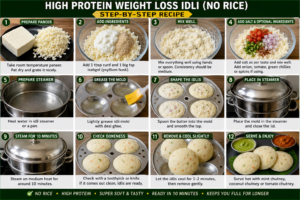
Step by Step Recipe Instructions

Step 1: Prepare Paneer

  • Take out the paneer from the fridge and let it reach room temperature
  • Towel dry the paneer pieces with a tissue paper or a clean kitchen towel
  • Grate the paneer finely so that it reaches the consistency of fine bread crumbs.

Step 2: Prepare the Batter

  • Add the grated paneer in a mixing bowl
  • Add 1 tbsp curd and 1 tsp isabgol
  • Mix well with hands or a spoon until you get a medium consistency batter.
  • Give it a rest for 23 mins so that it reaches soft consistency as the isabgol absorbs water.

Step 3: Add Salt and Optional Addons

  • Add salt to the batter as per your taste.
  • Optional: Also add chopped onions, tomatoes, green chilies, pepper powder or chat masala as per your taste.
  • Mix well so that all ingredients are combined.

Step 4: Prepare Steamer

  • Pour plenty of water in the idli steamer or a large vessel and bring it to boil.
  • Grease the idli moulds with desi ghee.

Step 5: Prepare the Idlis

  • Divide the idli batter in the greased idli moulds.
  • Ensure that the batter is evenly distributed and leveled with the back of the ladle.

Step 6: Steam the Idlis

  • Put the idli stand in the steamer and cover with a tight lid.
  • Steam the idlis for 10 mins on a medium flame.
  • Once done, check if the idli is cooked properly with a toothpick. If it comes out clean, its ready.

Step 7: Serve and Enjoy

Let the idli rest for 1-2 mins before taking them out and serve hot with mint chutney, coconut chutney or healthy homemade tomato chutney.

Nutritional Benefits of the Idli

  • High in protein content due to paneer
  • Low on carbs as no rice is used in it
  • Isabgol adds dietary fiber to it which also makes you feel full
  • Isabgol helps in reducing bad cholesterol
  • Low calorie content which helps to lose weight

Final Word

No rice high protein idli is a healthy breakfast recipe and also serves as a quick snack that fits in a calorie-restricted diet. A must try for everyone who loves paneer and wants to stay fit.

Healthy Weight Loss Sambar (Low Oil High Fibre) Healthy Vegetarian Sambar Recipe Without Oil

This healthy south Indian sambar is full of veggies, protein, and dietary fibers that help in weight loss. It is a low-calorie food that will keep you full for a long time, and pairs well with high-protein idlis.

Preparation Time

  • Prep Time: 10 mins
  • Cook Time: 20 mins
  • Servings: 3-4

Ingredients

For the Dal

  • ¼ cup toor dal (arhar dal)
  • 2 cups water
  • ¼ tsp turmeric powder

Vegies

  • 1 small carrot (chopped)
  • 5-6 beans (chopped)
  • 1 small onion or shallots (optional)
  • 1 small tomato (chopped)
  • ¼ cup pumpkin (optional)
  • ¼ cup bottle gourd (lauki)
  • 1 small drum stick (optional)
  • 2 tbsp chopped coriander leaves

Sambar Masala

  • 1 tbsp sambar powder (homemade or store bought)
  • ½ tsp roasted cumin powder
  • Salt to taste
  • Tamarind pulp (1 tbsp)

For Tempering

  • 1 tsp desi ghee or cold-pressed coconut oil
  • ½ tsp mustard seeds
  • ½ tsp cumin seeds
  • 8-10 curry leaves
  • 1 dried red chilli
  • A pinch of asafoetida (hing)

Instructions

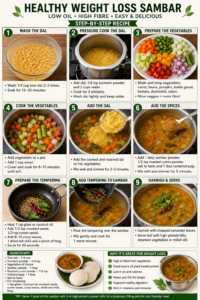
Step 1: Washing the Dal

  • Wash the toor dal with water 2-3 times.
  • Soak the dal in water for 15-20 mins, if possible to make it more tender.

Step 2: Pressure Cooking the Dal

  • Take the toor dal + turmeric powder + water in a pressure cooker, and cook for
  • 3 whistles in a pressure cooker or
  • 10-12 mins in an instant pot
  • Mash the cooked dal to make it smooth and tender.

Step 3: Prepare the Veggies

Wash all the veggies and cut them into small pieces. Here is what you can use.

  • Carrot
  • Bean pods
  • Pumpkin (optional)
  • Bottle gourd (optional)
  • Tomato
  • Drumstick (optional)
  • Onion/shallots (optional)
  • More veggies = better fibre + more volume to keep you full for a longer time.

Step 4: Cooking the Veggies

In a cooking pot, add

  • the chopped veggies + 1 cup water, and let it cook for 8-10 mins over medium flame, until tender.

Step 5: Add the Cooked Dal

  • Add the cooked dal and mix everything well, and cook for 2-3 mins.

Step 6: Add the Sambar Masala

Now add the

  • sambar powder + roasted cumin powder + salt + tamarind pulp and mix it well.
  • Let it cook for another 5 mins so that the sambar masala is well infused into the veggies and the dal.

Step 7: Tempering

  • In a small pan, heat the
  • desi ghee or coconut oil, add mustard seeds, cumin seeds, curry leaves, dried red chillies, and hing.
  • Let it cook for 30 seconds.

Step 8: Adding the Tempering

  • Add this tempering to the sambar and mix it well. Let it cook for another minute.

Step 9: Garnishing and Serving

  • Garnish the sambar with fresh coriander leaves, and serve hot with high-protein paneer idli, veggies, millet idli, or oats idli.

Healthy Weight Loss Benefits of this Sambar

  • High fibre (from veggies)
  • Protein from toor dal
  • Low oil and calories
  • High satiety with minimal calories. Fibre + protein will help in weight loss.
  • Healthy digestion due to high fibre.
  • Load of healthy vitamins and minerals!
  • This makes it a wholesome and healthy dish that fills you up when paired with high-protein idlis.

Weight Loss Tip

To have optimal fat loss, have 1 bowl of this healthy sambar with 3-4 high protein paneer idlis. It will have a good amount of protein, fibre, and healthy fats, with minimal carbs that will keep you full for a long time without bloating.


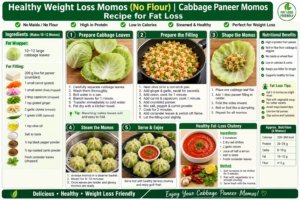
Healthy Weight Loss Momos (No Flour) Recipe | Cabbage Paneer Momos for Fat Loss

If you desire to lose fats and reduce weight on a consistent basis,but you love to eat momos regularly on daily basis,then this zero-carb flour-free healthy recipe is the best option for you.Instead of preparing traditional momos with maida or wheat flour, why not try making them with cabbage leaves!This unique cabbage momo recipe is absolutely healthy, high in protein, low in carbs, and loaded with fiber to help you lose weight.

Preparation Time

  • Prep Time: 20 minutes
  • Cooking Time: 15 minutes
  • Total Time: 35 minutes
  • Servings: 1012 momos

Ingredients

For the Momo Wrapper

  • 10-12 numbers of big cabbage leaves

For the Filling

  • 200 grams of low-fat paneer (crumbled)
  • 1 small size carrot (grated)
  • 1 small size onion (chopped finely)
  • 2 tablespoon finely chopped capsicum
  • 1 teaspoon grated ginger
  • 2 garlic cloves (minced)
  • 1 green chilly (optional)
  • salt to taste
  • ½ teaspoon black pepper powder
  • ½ teaspoon roasted cumin powder
  • 1 teaspoon olive oil
  • fresh coriander leaves (chopped)

Method

Step 1: Prepare Cabbage Leaves

  • Take out the cabbage leaves from the cabbage without tearing them
  • wash them properly boil some water in a big pan,
  • Then add the leaves and let them blanch or cook for a minute
  • then take them out in a bowl of cold water.
  • Now take out the leaves from the water and pat them dry with a kitchen towel. Blanching cabbage leaves will help soften them so that they can be folded easily without tearing.

Step 2: Prepare the Filling

  • Heat olive oil in a non-stick pan.
  • Now add in the ginger and garlic and let them roast for a few seconds.
  • Then add in the chopped onions and let them cook for a minute.
  • Now add in carrot and capsicum and let them cook for another minute.
  • Then add in the crumbled paneer and mix salt, black pepper, and roasted cumin powder.
  • Now cook the mixture for 23 minutes and finally add chopped coriander leaves and turn off the heat.
  • Wait for the mixture to cool down a bit.

Step 3: Prepare Momos

Take out one cabbage leaf on a plate and add one tablespoon of the paneer mixture in the middle of the leaves.

Now start folding the edges of the cabbage leaves over the paneer mixture to prepare momo-like parcels. You can either roll them or fold them to make momos.

Step 4: Steam Momos

Once all the momos are prepared, arrange them in a steamer basket and start steaming them for 810 minutes. Once the cabbage leaves are tender and glossy, then turn off the heat and enjoy your healthy cabbage paneer momos.

Nutritional Benefits

  • Protein-rich due to low-fat paneer.
  • High in fiber from cabbage and veggies.
  • No maida or wheat flour.
  • Low calorie, low carbs.
  • Keeps you full for long.
  • Healthy and sustainable fat loss.

Fat Loss Tips

  • Have 56 momos as light dinner or evening snack
  • Have soup or protein shake along with it
  • Avoid mayo based sauces as they are high in calories
  • Have adequate protein and exercise regularly.

Conclusion

These healthy fat loss friendly and low-carb No Flour Cabbage Paneer Momos are a great alternative to traditional momos for a person on dieting. It is tasty and filling without the guilt of eating extra calories from maida or wheat flour. So go ahead and make this healthy steamed momo recipe today.

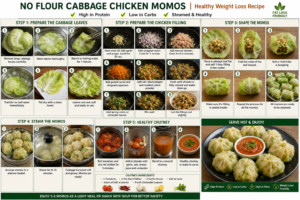
Healthy Weight Loss Momos (No flour) | Cabbage Chicken momo recipe for fat loss:

These flour-free Cabbage Chicken Momos are a healthy weight loss recipe option for you if you are craving for some good old comfort food that doesn’t leave you feeling bloated or sluggish. Instead of the usual maida wraps, we have used tender cabbage leaves to wrap a healthy high-protein chicken stuffing in these healthy low calorie momos, which are absolutely perfect for a healthy diet meal or a post-workout treat.

Preparation Time

  • Cook time: 15 minutes
  • Prep time: 20 minutes
  • Total time: 35 minutes
  • Servings: 1012 momos

Ingredients

Momo Wrapper:

  • 10-12 large cabbage leaves

Chicken Filling:

  • 250gms chicken breast (minced or finely chopped)
  • 1 small onion (chopped)
  • 1 small carrot (grated)
  • 2 tablespoon finely chopped capsicum
  • 1/2 teaspoon grated ginger
  • 3 cloves garlic (minced)
  • 1 green chilli (optional)
  • 1 teaspoon olive oil
  • Salt to taste
  • 1/2 teaspoon black pepper powder
  • 1/2 teaspoon roasted cumin powder
  • 1 tablespoon chopped spring onion or coriander leaves

Instructions

Preparing the cabbage leaves:

Make sure you remove the cabbage leaves carefully so that they do not tear. Wash them properly in running water and then blanch them in boiling water for 1 minute. Now, drain them and transfer them to cold water. Pat them dry with a kitchen towel. You can use these leaves to wrap your momos filling.

Making the chicken stuffing:

Heat oil in a non-stick pan, add the minced garlic and grated ginger. Sauté for 30 seconds.

Add the chopped onion and cook for about 1 minute.Add the chopped chicken breast to the pan and cook for 45 minutes. Then add the grated carrots and chopped capsicum and cook for a few more minutes. Add salt, roasted cumin powder, and black pepper powder to it and mix well. Cook until all the moisture has been extracted out. Add the chopped spring onion or coriander leaves and mix well. Let the stuffing cool down before you start making the momos.

Making the momos:

Take a cabbage leaf, place one tbsp of the chicken stuffing in the centre and fold the leaf from both sides and make a parcel. Repeat the same step with the rest of the leaves and stuffing to make momos.

Steaming the momos:

Place them in a steamer and steam for 810 minutes. Remove them once the leaves have turned tender and glossy.

Conclusion

The Healthy Weight Loss Momos (No flour) is a recipe that satisfies your craving for a good meal while keeping you on the path of weight loss. This No-Flour Cabbage Chicken Momos recipe is loaded with healthy chicken protein and a packet of healthy goodness to fill you up without weighing you down. Tender cabbage leaves wrap up everything perfectly and give you a wholesome meal that is absolutely lip-smacking and a perfect healthy addition to your diet, without adding any extra calories to your diet. The Cabbage Chicken Momos recipe is extremely easy to make and you can enjoy them as a healthy postworkout meal or even as a tasty healthy dinner for your entire family.

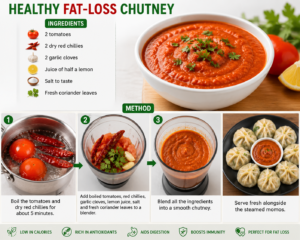
Healthy Weight Loss Chutney

Ingredients

  • 2 tomatoes
  • 2 dry red chillies
  • 2 cloves of garlic
  • Salt to taste
  • A few coriander leaves
  • Juice of half a lemon

Method

  • Boil tomatoes and dry red chillies for 5 minutes.
  • Blend everything together.
  • Serve fresh with steamed momos.

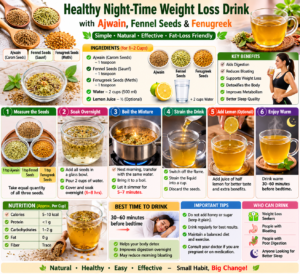
Healthy Night-Time Weight Loss Drink with Ajwain, Fennel Seeds & Fenugreek – Step-by-Step Recipe

This Healthy Night-Time Drink made of Ajwain, Fennel Seeds and Fenugreek Seeds is perfect for everyone who wants to lose weight. Ajwain, Fennel, and Fenugreek seeds help to lose weight due to their high fiber, essential oil, and other nutrients contents. Drinking this herbal infusion in the evening helps to control weight and supports a healthy lifestyle.

Preparation time

Soaking time: 68 hours (overnight)

Cooking time: 57 minutes

Servings: 12

Ingredients

  • 1 tsp Ajwain (Carom Seeds)
  • 1 tsp Fennel Seeds (Saunf)
  • 1 tsp Fenugreek Seeds (Methi)
  • 2 cups (500 ml) water
  • Juice from half a lemon (optional)

Instructions

Take the following ingredients:

  • 1 tsp Ajwain (Carom Seeds)
  • 1 tsp Fennel Seeds (Saunf)
  • 1 tsp Fenugreek Seeds (Methi)

Wash all seeds thoroughly with running water.

Soaking Step:

Put all seeds in a glass or a bowl and add 2 cups of water.

Soak them overnight or for at least 6 hours. Let it sit for a while.

Boiling Step:

Take all the soaked water and seeds and put them in a saucepan.

Boil everything on medium heat for 5-7 minutes. Let it cook for a little bit more.

Straining Step:

Turn off the heat and strain the boiling mixture into a cup.

Let the mixture cool down to a comfortable temperature. Drink it while it is warm.

Taste Step (Optional):

You can add the juice of half a lemon to enhance the flavor and get an extra dose of vitamin C.

How to take

Consume the herbal tea 3060 minutes before going to bed. Drink it regularly as a part of your healthy lifestyle.

Healthy benefits

It helps with better digestion. It also reduces water retention and bloating. It is good for the metabolic rate. It is caffeine-free and low in calories. It keeps you full for a long time, so you cannot eat more during the day or at night. This Healthy Night-Time Weight Loss Drink with Ajwain, Fennel Seeds, and Fenugreek Seeds will make you feel well when consumed with healthy eating patterns, physical activity, and good sleep.

Conclusion

This Healthy Night-Time Drink made of Ajwain, Fennel Seeds and Fenugreek Seeds is not difficult to make and will help you feel more rested and healthy during the day. However, you should not expect miracles: a single herbal tea cannot get rid of fats, but healthy eating patterns, physical activity, and enough sleep will.


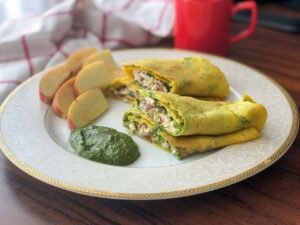
Green Sprouts Chilla with Paneer and Lots of Vegetables

A High-Protein, Fiber-Rich Breakfast for Weight Loss and Healthy Living

Introduction

Green sprouts chilla with Paneer and lots of vegetable is a healthy and protein-rich dish that can be served as breakfast, lunch, or dinner. Sprout moong, vegetables, and paneer will give you energy, keep your muscles strong, improve your digestion, and keep you full for a long time.

🥗 Ingredients (Makes 4 Chillas)

For the Batter

  • 2 cups green moong sprouts
  • 2 green chilies (optional)
  • 1 inch ginger
  • 3 garlic cloves
  • 2 tbsp coriander leaves
  • ½ tsp cumin seeds
  • ½ tsp turmeric powder
  • ½ tsp black pepper
  • Salt to taste
  • 24 tbsp water (optional)


For the Filling

  • 200 g low fat paneer, crumbled
  • ½ cup onion, finely chopped
  • ½ cup capsicum, finely chopped
  • ½ cup carrot, grated
  • ¼ cup cabbage, finely chopped
  • ¼ cup spinach, finely chopped
  • 2 tbsp coriander leaves
  • 1 green chilly, finely chopped (optional)
  • ½ tsp oregano or mixed herbs (optional)
  • Salt and black pepper to taste

For Cooking

  • 2 tsp olive oil or ghee

👩‍🍳 Step-by-Step Recipe

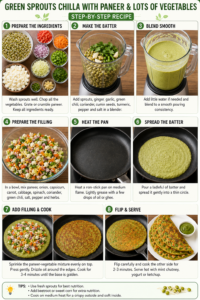
Step 1: Prepare the Sprouts

Soak and wash the green moong sprouts well.

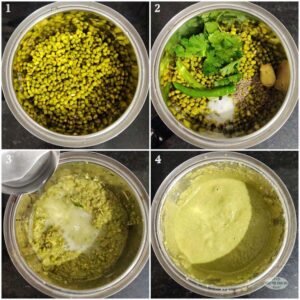
Step 2: Make the Batter

Add the moong sprouts, ginger, garlic, green chilies, coriander leaves, cumin seeds, turmeric, pepper, and salt into a blender. Blend into a smooth batter with a little water.

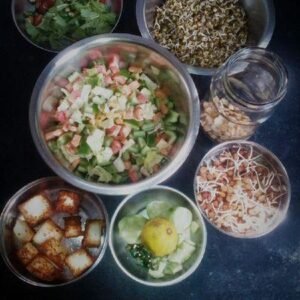
Step 3: Prepare the Filling

In a bowl, add crumbled paneer, onion, capsicum, carrot, cabbage, spinach, coriander leaves, herbs, salt, pepper, and mix well.

Step 4: Heat the Pan

Heat a non-stick pan or tawa over medium flame.

Step 5: Cook the Chilla

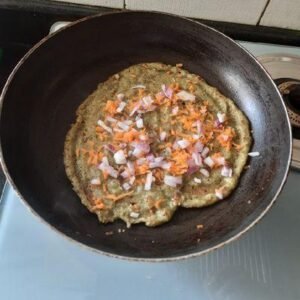
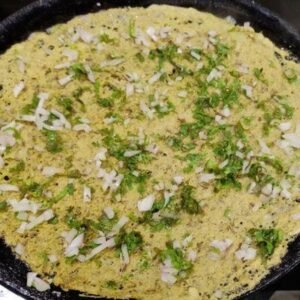
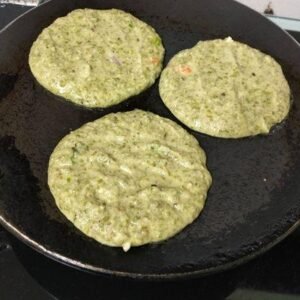
Take one ladle of the batter and drop it into the center of the pan. Spread it out in the form of a circle with the back of the ladle.

Step 6: Add the Toppings

Once the edges of the chilla are slightly crisp add the paneer and vegetable filling and press down firmly with the back of the ladle.

Step 7: Flip and Cook

Drizzle oil around the edges and cook for 34 minutes. Flip it over and cook the other side for 23 minutes or until golden brown.

Step 8: Serve

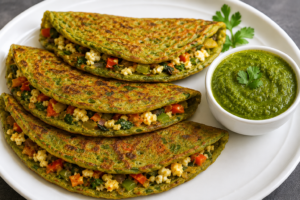
Transfer it to a serving plate and repeat the process with the remaining batter. Serve hot with mint and coriander chutney, or with yogurt.

💪 Why You’ll Love This Recipe

Protein-packed sprouts and paneer will keep you full for longer

✅ Good for digestion due to the fiber, vitamins, and minerals.

Helps in weight loss and maintains muscle mass.

Can be included as a healthy breakfast, lunch, and dinner.

💡 Healthy Ideas

  • Include grated beetroot in the mixture for extra goodness.
  • Sprinkle some flaxseeds or chia seeds in the batter for omega-3 fatty acids.
  • Use homemade paneer for better taste.
  • Try to cook on medium flame for chilla with a crispy bottom and spongy top.

🍽️ Serving Suggestions

Serve with:

Fresh mint-coriander chutney

Yogurt dip

Tomato salsa

Buttermilk or vegetable juice

This healthy green moong sprouts chilla with paneer and veggies is an excellent option for a wholesome and protein-packed breakfast, lunch, or dinner. The dish is high in protein, fiber, vitamins, and minerals to help you stay healthy and fit.

Conclusion

This Green Sprouts chilla is a very simple yet healthy recipe made of nutritious ingredients which are full of protein, fibre, vitamins and minerals. It is a delicious dish that can be relished with mint chutney or yoghurt to make a healthy and tasty meal for the entire family.


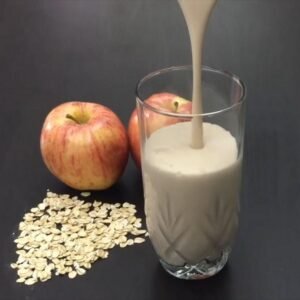
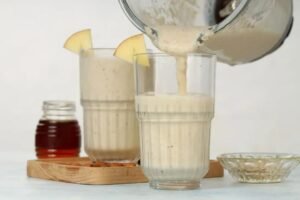
Oats, Apple & Almond Milk Drink

A Creamy, Fiber-Rich, Weight-Loss-Friendly Breakfast Smoothie

Introduction

Start your morning with this satisfying Oats, Apple, and Almond Milk Drink. This healthy breakfast drink has fibre, vitamins and plant-based goodness to give you the energy you need to start your day. It is made with simple ingredients that provide you with the sustained energy you need for an active lifestyle. It is a healthy breakfast option that helps keep you full and healthy throughout the day. It can also be prepared quickly to serve as a healthy snack throughout the day.

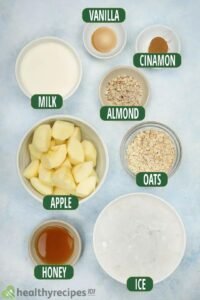
🥣 Ingredients (Serves 2):

  • 1 medium apple, chopped, with seeds removed
  • ½ cup rolled oats
  • 2 cups unsweetened almond milk
  • 810 almonds, soaked overnight with the skin removed, optional
  • ½ tsp of cinnamon powder
  • 1 tsp chia seeds, optional
  • 1 tsp of honey or maple syrup, optional
  • 45 ice cubes, optional

👩‍🍳 Step-by-step Recipe:

Step 1: Prepare the ingredients

Wash the apple, remove the seeds and cut into small cubes. Now take oats and almond milk, cinnamon powder, and soaked almonds (if using).

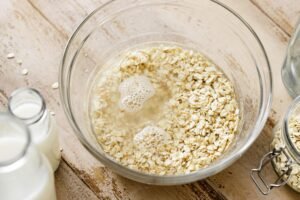
Step 2: Soak the oats

Soak rolled oats in a little almond milk for 1015 minutes. It will make the texture of the drink creamier and easier to digest.

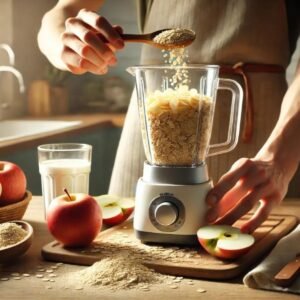
Step 3: Add all ingredients to the blender

Add oats, chopped apples, almond milk, soaked almonds (if using), cinnamon powder, and chia seeds (if using) to the blender.

Step 4: Blend until you get a creamy smoothie

Blend for about 12 minutes until you get a smooth consistency.

Step 5: Customize the thickness

If the mixture is too thick, add some more almond milk and blend for a few seconds.

Step 6: Serve and enjoy

Divide the mixture into two glasses. Add ice cubes (if using) and decorate each glass with thin apple slices, chopped almonds, and a sprinkle of cinnamon.

💪 Benefits

High in fiber for healthy digestion

Keeps you full for a long time and helps you avoid unhealthy snacking

Contains many vitamins and antioxidants

Good for the heart and low in cholesterol

Doesn’t contain dairy and is vegan-friendly (if not using honey)

A great breakfast or post-workout drink to refresh and energize you during the day

This Oats, Apple & Almond Milk Drink is a tasty and healthy drink made with healthy ingredients that will keep you full and give you a boost of energy for a long time.

Conclusion

An Oats, Apple, and Almond Milk Drink is a simple, wholesome recipe with tremendous health benefits. It is packed with fiber, antioxidants, and healthy fats and can help you achieve a healthy weight. This scrumptious drink is perfect for a healthy breakfast or as a healthy snack to keep you energized throughout the day.


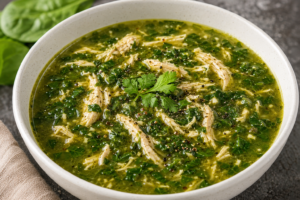
Healthy Palak Chicken Soup (Weight Loss Friendly)🍗🥣

High-Protein | Low-Carb | Easy to Make | Ready in 30 Minutes

🥣 Introduction

A healthy, filling meal that aids your weight-reduction efforts? Well, this healthy palak chicken soup has it all. Lean protein, iron-rich spinach, and other healthy ingredients go into this low-carb, high-protein, and super easy-to-make dish. It will leave you feeling full for a long time after your lunch or dinner.

⏱️ Preparing Time:

 Prep: 15 minutes

Cook: 20 minutes

Total: 35 min

Servings: 2

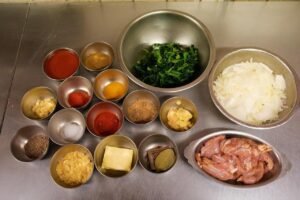
🛒 Ingredients

Main ingredients:

  • 250 g chicken breast, boneless
  • 3 cups spinach, palak, chopped
  • 1 tbsp desi ghee
  • 5 garlic cloves, chopped
  • 1 in. ginger, chopped/grated
  • 3 cups bone broth/water
  • ½ tsp freshly ground black pepper
  • ½ tsp himalayan salt, or to taste

Optional ingredients:

  • ¼ tsp. turmeric powder
  • ¼ tsp. roasted cumin powder
  • ½ tsp. lemon juice
  • fresh coriander leaves, to garnish

👨‍🍳 How to Cook

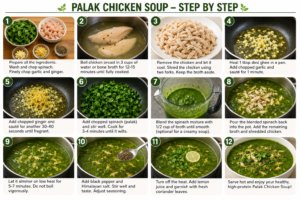
Step 1: Preparing the ingredients

  • Wash the spinach properly in running water.
  • Chop the spinach into roughly equal-sized pieces.
  • Chop the garlic and ginger finely.
  • Remove the fat from the chicken breast if it is not already done. Cut the chicken into small cubes. Use fresh raw chicken if possible.

Tip: Use fresh spinach for a healthier and tastier soup.

Step 2: Cooking the chicken

  • In a soup pot, bring 3 cups of either water or bone broth to a gentle boil.
  • Add the chicken breast and let it cook for 1215 minutes, or until it is done.
  • Remove the chicken and let it cool a bit. 
  • Then, use two forks to shred the chicken into tiny pieces.
  • Keep some of the soup broth for later use.

Tip: You can cook the chicken in the soup to enhance its flavor.

Step 3: Cooking garlic and ginger

  • Heat 1 tbsp. of desi ghee in a soup pot over medium heat.
  • Add chopped garlic and cook for 1 min or until it turns a golden color.
  • Add chopped ginger and stir for another 3040 sec, until it becomes aromatic.

 Make sure you do not burn the garlic.

Step 4: Cooking the spinach

  • Add chopped spinach to the pot and continuously stir for 3-4 min.
  • The chopped leaves will start to wilt and shrink in volume. 

If you want to add turmeric powder, do it now.

Step 5: Blending (optional)

  • Once done, you can let the spinach mixture cool down a bit and blend it with ½ cup of the soup broth to your desired consistency.
  • If you want to keep the texture chunky, skip this step.

Step 6: Finishing the soup

  • Return the blended mixture (or the cooked spinach) to the pot and add the remaining soup broth. Then, add the shredded chicken and let everything simmer together for 5-7 minutes. 
  • Do not let the soup boil.

Step 7: Seasoning

  • Add ½ tsp himalayan salt to the soup.
  • Sprinkle freshly ground pepper over the soup.
  • Add roasted cumin powder if you want. Mix everything together and taste the soup. 
  • Then, add seasonings to your liking.

Step 8: Garnishing and serving

  • Turn off the heat and add a few drops of lemon juice.
  •  Then, garnish the soup with coriander leaves. Serve the soup hot. 
  • Add a few pieces of shredded chicken on top to increase your protein intake if you want.

🌿 Health Benefits

Chicken is an excellent source of high-quality protein. Spinach contains iron, folate, vitamin A, vitamin C, and antioxidants. Garlic and ginger give this dish unique flavors and aroma. It is low in carbs, which makes it ideal for a variety of low-carb diets that promote weight loss. This soup is filling and has a good amount of nutrients, making it a healthy option for your daily meals.Everyone interested in maintaining a healthy lifestyle may want to try this soup. It is good for people who want to lose weight since it has healthy ingredients and is low in carbs. 

🍽️ How to Serve This Soup

You can serve this soup with a salad for a fulfilling and healthy meal. Since it is a relatively light dish, you can eat it for  dinner. To store the soup, you can put it in an airtight container in the fridge for up to 3 days. Reheat it over a low flame when needed.


Conclusion🍲

Palak chicken soup is a high-protein, low-carb, healthy, and delicious dish made of chicken and spinach. It will suit everyone who wants to lose weight, be healthier, or simply follow a high-protein diet. This soup is easy to make and goes well with an active and healthy lifestyle.


Healthy Paneer “Poha” with Lots of Vegetables (No-Poha Version with Almonds)

A Healthy Alternative to Flattened Rice Poha

Do you love the taste of poha but desire a healthier, proteinrich alternative with more vegetables? This Healthy Paneer “Poha” (No-Poha version) is a delicious option made with crumbled paneer instead of flattened rice that gives this popular dish its fluffy texture. Paneer in this recipe provides you with lots of healthy proteins while fresh vegetables add fiber, vitamins, and colors. Almonds add crunch and healthy fats. Healthy paneer poha is a great healthy option for breakfast, lunch, or dinner.

A Healthier Paneer Poha Option You Will Love

  • Loads of healthy proteins from paneer
  • Crunchy and healthy almonds
  • Fiber, vitamins, and minerals from vegetables
  • Light, no-flour, gluten-free
  • Perfect for a quick meal – takes only 20 minutes to make
  • Protein-rich for muscle gain and repair
  • Great for kids and adults
  • Easy to prepare, no artificial additives

Ingredients for Healthy Paneer “Poha” with Lots of Vegetables (No-Poha Version) (Serves: 2)

Main ingredients

  • 250 g of low-fat paneer, grated or crumbled into small cubes
  • 1 small onion, finely chopped
  • ½ cup of carrots, finely chopped
  • ½ cup of green capsicum, chopped
  • ¼ cup of green peas
  • ¼ cup of sweet corn (optional)
  • 2 green chilies, finely chopped (optional)
  • 8-10 curry leaves
  • 1 tbsp chopped coriander leaves
  • Juice of ½ lemon

Healthy crunch

  • 10 almonds, chopped


Tempering ingredients

  • 1 tsp olive oil or cold-pressed groundnut oil
  • ½ tsp mustard seeds
  • ½ tsp cumin seeds
  • ¼ tsp turmeric powder
  • Salt to taste
  • ¼ tsp black pepper

Step by step Healthy Paneer “Poha” with Lots of Vegetables:

Step 1: Prepare ingredients for healthy paneer poha

Chop all the vegetables, finely chop the onion, carrot, capsicum, coriander, and green chilies. Grate or crumble paneer until it reaches the consistency of poha. Chop the almonds into small cubes. The finer you grate paneer, the closer it will resemble traditional poha.

Step 2: Cook healthy vegetable mixture for paneer poha

Heat oil in a non-stick pan, add mustard seeds. When they start to crackle, add cumin seeds and curry leaves. Add onions and sauté for 2 minutes until they are soft. Add carrots, peas, capsicum, and corn. Mix well and cook for 4-5 minutes until the vegetables are tender but still crisp.

Step 3: Add tempering spices and cook healthy paneer poha

Sprinkle turmeric, black pepper, and salt. Mix well and cook for one more minute until the spices release their aroma. Add the finely grated paneer to the pan with vegetables.

Step 4: Cook paneer with vegetables

Reduce the heat to low and gently mix paneer and vegetables. Do not crush the paneer; let it retain its shape to resemble poha. Cook for 2-3 minutes. Paneer should not be overdone; it should remain tender.

Step 5: Add fresh coriander, lemon juice, and almonds

Turn off the heat and add fresh coriander leaves, lemon juice, and chopped almonds. Mix everything together.

Serving suggestions

Serve healthy paneer poha with:

  • fresh cucumber slices
  • mint yogurt dip
  • green chutney
  • buttermilk

Health benefits of healthy paneer poha recipe

Excellent source of healthy proteins

Paneer contains lots of proteins beneficial for muscle gain and repair. This dish is a healthy high-protein option and keeps you full for a longer time.

Loads of vitamins and minerals

Carrots, capsicum, peas, and coriander are packed with vitamins and minerals.

Healthy weight loss option

Due to the high protein content, this dish helps you feel full for a longer time; therefore, it can be used for healthy weight loss.

Heart-healthy fats

Almonds in this recipe are a source of healthy fats, vitamin E, magnesium, and other nutrients needed for heart health.

Blood sugar levels Control

Compared to traditional poha made of flattened rice, this healthy paneer poha option has fewer carbohydrates and is healthier for blood sugar control.

Expert nutritionist tips

  1. Use fresh paneer for this recipe to obtain the best consistency and taste.
  2. Add spinach or mushrooms if you want extra healthy options.
  3. You can toast almonds before adding them to this dish for extra flavor.
  4. Add lemon juice only after turning off the heat.
  5. Avoid overcooking paneer in this recipe to retain its soft consistency.

Delicious stir-fry with vibrant bell peppers and fresh ingredients in a cooking pan.

Final thoughts

Healthy Paneer “Poha” with Lots of Vegetables (No-Poha Version with Almonds) shows that you can enjoy healthy meals without sacrificing taste. With healthy proteins from paneer, loads of vegetables, wholesome almonds, and spices, this dish is a great alternative to traditional poha made of flattened rice. With the right portion sizes and an active lifestyle, this recipe can become part of your healthy eating plan for weight loss or general health improvement.


Healthy Cauliflower Rice with Vegetables (Step-by-Step Recipe) 🥦

Introduction

Cauliflower rice with vegetables is a healthy, low-carb, and high-nutrient dish. This dish is perfect for people on a diet, especially for those with diabetes. Besides, it is a quick and easy recipe that can be prepared in one hour for lunch or dinner.

Ingredients (2 Servings)

Cauliflower rice

  • 1 medium cauliflower
  • 1 tablespoon olive oil
  • 2 cloves of garlic, minced

Vegetables

  • ½ cup of carrots, finely diced
  • ½ cup of green beans, chopped
  • ½ cup of green peas
  • ½ cup of bell peppers, diced
  • 2 pcs of spring onions, chopped

Seasoning

  • Salt to taste
  • ½ teaspoon of black pepper
  • ½ teaspoon of oregano
  • ½ teaspoon of paprika or red chili flakes (optional)
  • 1 tablespoon of soy sauce (optional)
  • 1 teaspoon of lemon juice

Garnish

  • Fresh coriander or parsley
  • Spring onion greens

Step-by-Step Recipe:

👩‍🍳 Step 1: Prepare the Cauliflower

  1. Wash the cauliflower thoroughly and cut off the leaves and thick stem.
  2. Cut the cauliflower into florets and grate them on a box grater or pulse in a food processor until it reaches a rice consistency.
  3. Make sure not to over-process it, or it will turn out mushy.

🥕 Step 2: Chop the Vegetables

  1. Chop the carrots, green beans, bell peppers, and spring onions into small pieces.
  2. Keep the peas on the side.

🔥 Step 3: Sauté the Vegetables

  1. Heat some olive oil in a large pan over medium heat.
  2. Add the chopped garlic and sauté for 30 seconds.
  3. Add the carrots and beans and cook for 3 minutes.
  4. Then add the peas and bell peppers.
  5. Stir-fry for another 2-3 minutes until the vegetables are tender but still crisp.

🍚 Step 4: Cook the Cauliflower Rice

  1. Add cauliflower rice to the pan with the vegetables and stir fry everything together.
  2. Add salt, black pepper, oregano, paprika, and soy sauce.
  3. Cook everything for 5-6 minutes until the cauliflower is tender but still light and fluffy.
  4. Do not overcook it, or it will turn out mushy.

🍋 Step 5: Finish the Dish

  1. Turn off the heat and add lemon juice.
  2. Then add chopped coriander or parsley and spring onion greens.
  3. Your healthy and delicious cauliflower fried rice is ready to be served.

Health benefits

Cauliflower rice with vegetables is low in carbohydrates, high in fiber, and packed with vitamin C. It helps to lose weight, reduces the risk of diabetes, and keeps the blood sugar level stable. This dish is gluten-free and vegan-friendly.

Conclusion 

Cauliflower rice with vegetables is a healthy and easy-to-make dish that can be prepared in less than an hour. It is a perfect low-carb, keto, or diabetic-friendly dish that will suit anyone’s taste. This dish is full of vitamins and fiber and can be a great alternative to regular rice for every day of the week.


Healthy Butter Paneer for Weight Loss (Step-by-Step Recipe) 🧈

Introduction

Do you love eating butter paneer but cannot have it because it is not healthy? This healthy butter paneer recipe for weight loss is high in protein and low in calories. You can have this delicious butter paneer recipe with low-fat paneer and use less butter. It also uses a cream of yogurt gravy instead of the typical cream that is used to make the traditional butter paneer.

Ingredients (Serves 2)

For the Paneer

  • 250 gms paneer (low fat), cut into cubes
  • 1 tsp butter
  • ½ tsp turmeric powder
  • ½ tsp kashmiri red chili powder
  • ½ tsp cumin powder
  • Salt to taste

For the gravy

  • 2 medium tomatoes, chopped
  • 1 medium onion, chopped
  • 4 garlic cloves
  • 1 inch ginger
  • 8-10 cashew nuts (optional, can use 1 tbsp rolled oats instead)
  • 1 tsp butter
  • ½ tsp cumin seeds
  • ½ tsp coriander powder
  • ½ tsp garam masala
  • ½ tsp kashmiri red chili powder
  • Salt to taste
  • ½ cup greek yogurt (low fat), whisked
  • ½ cup water

Garnishing

  • 1 tsp chopped coriander
  • ½ tsp crushed kasuri methi

Step-by-Step Recipe:

Step 1: Preparing the paneer

Cut the low-fat paneer into cubes. Mix it with turmeric, chili powder, cumin powder, and salt. Keep it aside for 10 minutes.

Step 2: Cooking paneer

Take 1 tsp of butter in a non-stick pan. Add the paneer cubes to it and cook for 1-2 mins on both sides. Keep the cooked paneer aside.

Step 3: Cooking the gravy

In the same pan, add 1 tsp of butter. Add cumin seeds to it and let it split. Add the chopped onion, garlic, and ginger to it. Cook it for 4-5 mins till the onions are tender. Add chopped tomatoes and cashews to it. Cook for 8-10 mins till the tomatoes are soft.

Step 4: Grinding the gravy

Once the tomatoes are soft, turn off the heat. Blend the mixture into a thick smooth gravy. If it is thick add some water to it.

Curry step 5: Making curry

Add the blended gravy to the pan. Add coriander powder, garam masala, kashmiri red chili powder, and salt to it. Cook for 3-4 mins on a low flame. Add whisked greek yogurt to it and give it a good mix. Also, add water to it. Mix well.

Step 6: Adding paneer to the curry

Add the cooked paneer cubes to the gravy. Cook for 4-5 mins on a low flame so that it absorbs the flavors well.

Step 7: Garnishing

Crush kasuri methi in between your palms and add it to the curry. Garnish it with fresh coriander.

🌟 Why this recipe is healthy for weight loss:

High in protein to keep you full for longer.

Made with low-fat paneer instead of regular paneer.

Used low-fat Greek yogurt instead of heavy cream.

Very little butter has been used.

Lots of tomatoes, onions, and spices to add flavor without extra calories.

📝 Conclusion

This healthy butter paneer recipe is the perfect way to enjoy flavorful Indian food while on a weight loss journey. By using high-protein paneer, lighter gravies, and minimal amounts of butter, you can indulge in this delightful dish without derailing your diet. Pair it with some cauliflower rice or whole wheat roti for a wholesome and satisfying meal.

🥪 High-Protein Breadless Paneer Sandwich for Weight Loss

(The Sandwich Layers Are Made with Paneer Too!)

This healthful sandwich is made from paneer rather than bread, making it an excellent source of protein, it’s an ideal choice for a diet plan.

Introduction

 This High Protein Breadless Paneer Sandwich is a great option for anybody who is trying to lose weight or avoid eating too many carbs. It uses crispy layers of paneer as bread instead of traditional bread. Paneer is also an excellent source of both protein and calcium, providing you with a substantial and nutritious meal in every bite! The sandwiches will fill you up with their tasty combination of paneer and cheese. Best of all, this recipe can be made in 20 minutes, and can be enjoyed any time of day – breakfast, lunch, or after workouts. For a complete and balanced meal that helps you meet your weight loss goals and still tastes fantastic, serve your sandwiches with a small salad or a mint yoghurt dip.

Ingredients (Makes 1 serving)

For the Paneer “Bread” Layers

  1. 200 g Low Fat Paneer-Grated
  2. 1 Egg (or 1 Tbsp Cornflour If Vegetarian)
  3. 30 g Mozzarella Cheese-Grated
  4. ½ tsp Garlic Powder
  5. ½ tsp Black Pepper
  6. Salt To Taste
  7. ½ tsp Oregano

For The Filling

  1. 100 g Low Fat Paneer-Grated
  2. 20 g Mozzarella Cheese
  3. 1 Tbsp Finely Chopped Capsicum
  4. 1 Tbsp Finely Chopped Onion
  5. ½ tsp Chilli Flakes
  6. ½ tsp Oregano
  7. Salt And Black Pepper To Taste

For Cooking

  1. 1 tsp Olive Oil/Butter 

👩‍🍳 Step-by-Step Recipe

Step 1: Preparing Paneer Bread Mixture

Take a bowl and add the following ingredients into it:

  • 200 g paneer grated
  • 1 egg
  • 30 g mozzarella
  • Garlic powder
  • Oregano
  • Salt
  • Black pepper
  • Mix everything together until you get a sticky mixture.


Step 2: Preparing Paneer Bread

  • Heat a non-stick pan on a low flame and grease it with some olive oil.
  • Now, make two equal parts of the mixture that you have prepared in Step 1.
  • Make a square or a rectangle out of one part with a thickness of ½ cm, and put it into the pan.
  • Let it be cooked for 45 minutes on a low flame.
  • Then, flip it and cook it for another 34 minutes.
  • Do the same thing with the other part to make another paneer layer.


Step 3: Preparing Filling

Take another bowl and add the following ingredients into it:

  • 100 g paneer grated
  • Mozzarella cheese
  • Capsicum
  • Onion
  • Chili flakes
  • Oregano
  • Salt
  • Black pepper
  • Now, mix everything together.


Step 4: Preparing the Sandwich

  • Take one of the prepared layers and put it on a plate.
  • Then, put the mixture that you have prepared in Step 3 on it.
  • Now, put the other layer of paneer on top of the mixture.

Step 5: Finish Cooking the Sandwich

  • Now, return the sandwich to the pan and let it be cooked for 23 minutes on each side until the mozzarella is melted and the layers are slightly caramelized.

Step 6: Serve

  • Finally, cut the sandwich into two pieces and serve it warm with mint yogurt dip or fresh cucumber salad.

💪Why this recipe is healthy for weight loss

High in protein to help maintain muscles.

There is no bread and is much lower in carbs than a normal sandwich.

It will keep you feeling full after you eat it.

It has lots of calcium, and is filling enough to serve as a healthy breakfast, lunch, or dinner.

Tip:

To make it healthier, use low fat paneer and reduced fat mozzarella, and use spinach or finely chopped mushrooms as a filler to add more volume, while not adding many calories.

A Healthier Option That You Will Enjoy

This bread free paneer sandwich is a healthier option that fills you with protein, while satisfying your cravings for a sandwich. Using paneer in both the bread and the filler, you will enjoy every bite of this high protein and healthy sandwich. Pair it with a salad for a healthy, filling, and delicious meal.


🌼 Refreshing Chamomile Wellness Drink (Juice-Style)

Introduction

This light and refreshing drink made with chamomile tea, fresh lemon juice, cucumber, and mint is the perfect choice for hot summer days. It is low in calories while providing an abundance of hydration and has many health benefits that can help you achieve a healthy weight loss.

🛒 Ingredients (2 Servings):

  • 2 chamomile tea bags or 2 tablespoons of chamomile flowers
  • 2 cups (500 ml) hot water
  • ½ cucumber, chopped
  • The juice of 1 lemon
  • 8–10 fresh mint leaves
  • 1 teaspoon honey
  • Ice cubes
  • Lemon and mint slices for garnish

👩‍🍳 How to Prepare Chamomile Lemonade

Step 1: Steep the chamomile tea bags or the flowers in the boiling water for 57 minutes. Then, let it cool down

Step 2: Blend the cooled down chamomile tea, cucumber, lemon juice, mint leaves, and honey with ice cubes until you get a smooth consistency.

Step 3: If desired, you can also sieve the mixture for a smoother texture.

Step 4: Divide the mixture into two glasses filled with ice cubes and garnish with lemon slices, fresh mint leaves, and serve chilled.

💚 Benefits:

  • Light and refreshing
  • Hydrating
  • Contains no caffeine
  • Loaded with antioxidants
  • Calorie-free alternative to sweetened beverages

Conclusion

This healthy and delicious chamomile lemonade is a perfect addition to your summer weight loss diet. It is light, refreshing, and provides an abundance of hydration. You can enjoy this delicious drink with every meal or have it as a snack to feel satisfied for a long time. Add it to your healthy eating habits and an active lifestyle to achieve healthy weight loss.