Healthy Stuffed Pomfret (Pompano) Masala Fish Recipe

High-Protein | Healthy | Fat Loss Friendly

This healthy and tasty stuffed pomfret fish recipe is made with freshly roasted masala and healthy fats such as virgin coconut oil or desi ghee. With lots of protein and no carbs, this dish will be the best addition to your healthy weight loss or fitness diet plan.

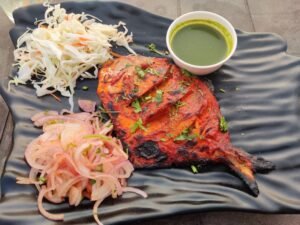
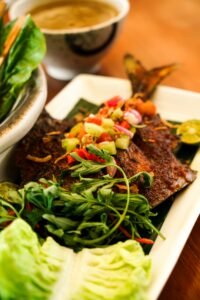
Deliciously grilled pomfret served with onions, coleslaw, and green sauce on a black plate.

Preparation Time 

  • Prep Time:20 min
  • Cook time:1520 min
  • Total time:35-40 min
  • Servings: 2

Ingredients

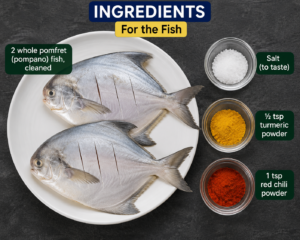
For the fish

  1. 2 whole pomfret (pompano) fish, cleaned
  2. Salt to taste
  3. ½ tsp turmeric powder
  4. 1 tsp red chili powder


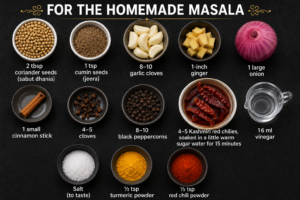
For the homemade masala

  1. 2 tbsp coriander seeds (sabut dhania)
  2. 1 tsp cumin seeds (jeera)
  3. 810 garlic cloves
  4. 1 inch ginger
  5. 1 big onion
  6. 1 small cinnamon stick
  7. 45 cloves
  8. 810 black peppercorns
  9. 8-10 Kashmiri red chilies, soaked in a little warm sugar water for 15 min
  10. 16 ml vinegar
  11. Salt to taste
  12. ½ tsp turmeric powder
  13. ½ tsp red chili powder


For frying

  1. 23 tbsp desi ghee or virgin coconut oil

Instructions

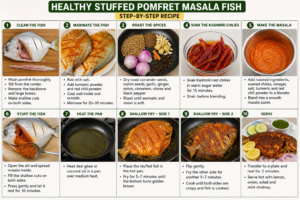
Step 1: Prepare the fish

  • Wash the pomfret fish in running water.
  • Pat dry with a kitchen towel.
  • Make a slit in the center of the fish.
  • Remove the backbone as well as large bones, leaving the thin ones.
  • Make a few cuts on both sides so that the masala can get in.

Step 2: Marinate the fish

  • Sprinkle salt on both sides of the fish. Add some turmeric powder. Sprinkle some red chili powder.
  • Apply the salt and spices on both sides of the fish.
  • Marinate it for 20-30 min.

Step 3: Prepare the homemade masala

  • Dry roast coriander seeds till they become fragrant. 
  • Add cumin seeds, and dry roast for a few sec.
  • Roast garlic and ginger.
  • Roast onion till tender and a bit charred.
  • Add cinnamon, cloves, and black peppercorns, Roast for 30-40 sec.
  • Now grind all the roasted masala ingredients in a blender.
  •  Add the chopped Kashmiri chilies that have been soaked in sugar water.
  • Also add 16 ml vinegar, salt, turmeric, and red chili powder.
  •  Grind to make a thick masala paste.

Step 4: Stuff the fish

  • Open the slit in the marinated fish. 
  • stuff it generously with the masala prepared above.
  • Also fill the cuts made on the fish with the masala. 
  • Press the stuffing to make it firm.
  • Let it rest for another 10 min.

Step 5: Shallow Fry the fish

  • Heat oil in a heavy bottomed pan on medium flame.
  • Gently place the stuffed fish in the hot oil. 
  • Fry for 5-7 min on one side.
  • Now turn it over with a wide spatula and fry for another 5-7 min on the other side.
  • Keep frying till the fish is cooked through and the masala is aromatic.

Step 6: Serve

  • Remove the fried fish from the pan and transfer it to a serving plate.


You can serve it with lemon wedges, onions, cucumber salad, mint chutney, steamed veggies or green salad.

Healthy Tips

  • Use virgin coconut oil or desi ghee while preparing this dish. 
  • Avoid using cheap edible oil.
  • Do not deep-fry the fish to keep the dish healthy and low in calories.
  • Always use freshly roasted masala instead of store-bought readymade masala.
  •  This way, you can have control over the health benefits and flavor of your dish.
  • Instead of having rice with your fish, try having veggies to reduce the carb content so that the dish becomes more suitable for fat loss.
  • This healthy stuffed pomfret recipe is high in protein and healthy fats and low in carbs. 


Vibrant dish of spicy grilled fish topped with vegetables served alongside fresh greens and soup.

Enjoy this flavorful dish without worrying about weight gain as it is a perfect fit for healthy eating.


Healthy High-Protein Pizza for Weight Loss

🍕 Introduction

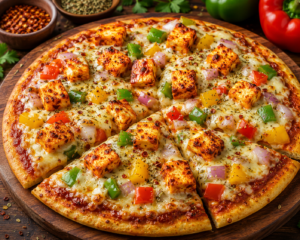
Bet you thought pizza was offlimits when trimming down. Surprise – this version brings high-protein goodness without skipping flavor. Not only does it swap white flour for eggs and psyllium husk, but also builds a tender base rich in protein, light on carbs. Picture bright chunks of bell pepper dancing across the top. Add smoky tandoori paneer, let melty mozzarella weave through. Each mouthful feeds your body well while feeling like a treat. Who knew eating clean could taste this good. Baking your own pizza at home might be just what you need if losing weight matters to you. This version works well when protein intake is a priority too. It satisfies cravings without weighing you down later. The flavors come together fast, yet nothing feels rushed. Ready before half an hour passes, each bite holds its promise. A few ingredients make the difference here.

Pizza That Fits Your Weight Loss Goals

  • Packed with protein thanks to eggs along with paneer, helping keep muscles strong. Muscle upkeep gets a boost from these two main ingredients working together.
  • Bursting with fiber thanks to psyllium husk, otherwise known as isabgol – keeps hunger at bay by stretching that satisfied feeling. Fullness lingers because of how this ingredient slows digestion down.
  • Bursting with bright veggies that bring nutrients, defense helpers, a rainbow on your plate. Fresh picks fuel the body, hand by hand they add up to strong days. Each bite carries quiet power from greens, yellows, redsnature’s mix without fuss.
  • Baked less crisp, this version skips the white flour crunch. Instead of typical crusts, it uses grains that stay closer to their natural form. Fewer processed carbs make a difference here compared to classic pies.
  • One bite won’t derail your goalsif you keep the amount in check. This choice brings fullness without packing excess calories. Think of it as a quieter flavor that still satisfies. Portion size matters more than frequency here. It fits well alongside other whole foods. A small plate leaves room for movement later. Energy balance shifts slowly, not overnight.

Ingredients

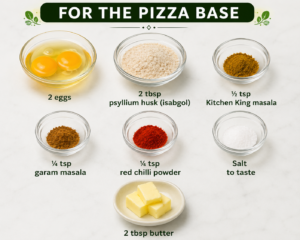
For the Pizza Base

  • 2 eggs
  • Two tablespoons of psyllium husk, also known as isabgol
  • ½ tsp Kitchen King masala
  • ¼ tsp garam masala
  • ¼ tsp red chilli powder
  • Salt to taste
  • 2 tbsp butter

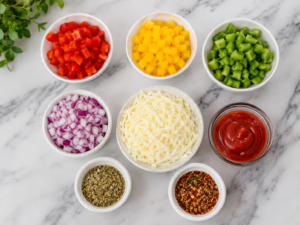
For the Toppings

  • Red bell pepper (diced)
  • Yellow bell pepper (diced)
  • Green bell pepper (diced)
  • A single small onion, cut into tiny pieces
  • Grated mozzarella cheese (moderate amount)
  • Weight-loss ketchup
  • Italian seasoning
  • Pizza seasoning

For the Tandoori Paneer

  • 150–200 g paneer (room temperature)
  • 1–2 tsp tandoori masala
  • 2–3 tbsp desi ghee

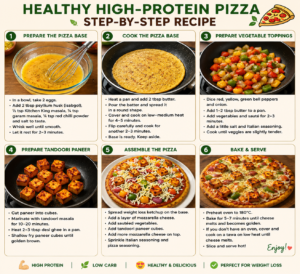
Step 1:Prepare the pizza base

Two eggs go into a bowl. Alongside them, toss in some psyllium husk, Kitchen King masala, garam masala, red chilli powder, plus a pinch of salt. Stir everything togetherkeep going one full minute at least, maybe two, till it turns even and just thick enough. Wait right there, leave it sitting for three minutes flat while the psyllium pulls in liquid.

Step 2:Cook the Pizza Base

Start by warming a non-stick pan on low-medium heat, then add two spoons of butter to melt slowly. Once ready, tip the mixture into the center so it flows outward like a flat circle. A lid goes on top nowlet it sit four or five minutes while the bottom firms up. Turn it gently after that time has passed; keep going for two more minutes at least. Move it off the stove when done, leave it waiting nearby.

Step 3:Prepare the vegetable toppings

Melt some butter in a skillet over medium heat. Toss in chopped red, yellow, and green peppers together with onion pieces. Cook them for two or three minutes – just enough to soften a bit while keeping their crunch. Sprinkle in a little salt followed by a touch of Italian herbs near the end.

Step 4:Cheese cooked in tandoor spices

Start by dicing the paneer into small cubes you can eat in one go. Sprinkle tandoori masala all over, making sure every piece gets coveredleave it sitting for around 10 to 20 minutes. Warm some desi ghee on a flat skillet, toss in the pieces, then fry slowly till each side turns crisp and golden.

Step 5:Pizza Assembly Complete

A smear of slimming ketchup goes first on the warm crust. Over that, a dusting of shredded mozzarella settles lightly. Sautéed veggies scatter next, spread without crowding. After them come cubes of tandoori paneer, placed one by one. Another whisper of cheese floats on top. Herbs land last – Italian blend meets pizza spice in small pinches.

 Step 6:Bake Or Melt The Cheese

Start by warming the oven to 180 degrees Celsius, which is about 356 Fahrenheit. The pizza needs around five to seven minutes inside, just long enough for the cheese to turn soft and take on a faint gold tint. Without access to an oven, try using a flat griddle insteadset the pizza down, trap the heat with a lid overhead, then let it sit under gentle warmth until every bit of cheese gives way into meltiness.

🍽️ Serving Suggestion

Start by cutting the pie into pieces, then enjoy it warm alongside a crisp green salad – pairing it with a light yogurt dip boosts the protein. A meal like this fills you up without weighing you down.


Final Thoughts

Who says you have to skip treats to eat well. A slice of this High-Protein Pizza brings flavor, fullness, and good nutrition togetherideal when hunger hits but balance matters. Made without hassle, it loads in protein and veggies so meals stay tasty yet aligned with how you aim to feel. Taste isn’t lost here, just reshaped quietly into something kinder.


high-protein brown rice bowl using the ratio 60% chicken, 30% vegetables, and 10% other ingredients 

Introduction

Start your day right with a satisfying mix of tender chicken, crisp veggies, and earthy brown rice in every bite. About six out of ten bites come from grilled poultry, adding strong support for body repair and strength. Topped with colorful producethink greens, peppers, carrots – you get variety without fuss or clutter on the plate. Roughly a third of what’s inside brings natural crunch plus slowreleasing energy sources. Just a small portion of whole grain sits at the base, grounding each serving with texture and staying power. Nutrients spread evenly across proteins, good fats, plant fibers, giving steady fuel through busy afternoons. Anyone focused on fitness goals might find it fits well into their rhythmgain, shed, or stay balanced. Cooking takes little time; assembling ahead works just fine if mornings run tight or chaotic. Satisfying doesn’t mean heavyit lifts mood, settles hunger, avoids crashes later. Flavor stands clear but never shoutssimple seasoning lets real food taste like itself. Choose this when dinner needs no drama, yet still counts toward wellness done quietly.

From above of crop anonymous male eating tasty dish with meat and vegetables at wooden table

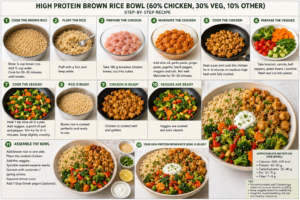
High Protein Brown Rice Bowl One Serving

Ingredients

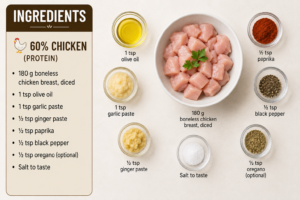
60% Chicken (Protein)

  1. Eighteen grams of skinless chicken breast, cut into small pieces
  2. 1 tsp olive oil
  3. 1 tsp garlic paste
  4. ½ tsp ginger paste
  5. ½ tsp paprika
  6. ½ tsp black pepper
  7. Half a teaspoon of oregano if you feel like it
  8. Salt to taste

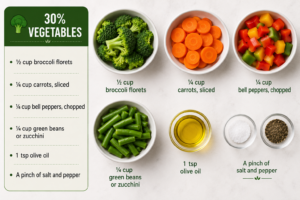
30% Vegetables 

  1. 1/2 cup broccoli (florets)
  2. ¼ cup carrots ;
  3. ¼ cup chopped bell peppers
  4. ¼ cup of zucchini or green beans
  5. 1 tsp of olive oil.
  6. A little salt and pepper

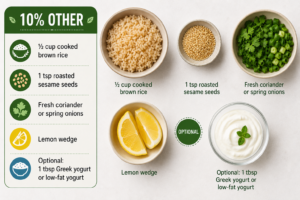
10% Other

  1. Half a cup of brown rice, once it’s been cooked. That’s how much you need right there
  2. 1 tsp roasted sesame seeds
  3. Fresh coriander or spring onions
  4. Lemon wedge
  5. A small spoon of thick yogurt might work here instead. Try a lighter option if preferred. One tablespoon fits the need well

Step-by-Step Instructions

Step 1:Cook the brown rice

  1. Wash ¼ cup uncooked brown rice.
  2. Half a cup of water goes in next.
  3. Halfway through the time, check if it gives when poked. After about half an hour, it should soften enough to eat.
  4. Use a fork to pull apart the soft bits.

Step 2:Marinate the chicken

  1. Mix the chicken with:
    1. Olive oil
    2. Garlic paste
    3. Ginger paste
    4. Paprika
    5. Black pepper
    6. Salt
  2. Leave it sitting for about a quarter to twenty minutes.

Step 3:Cook the Chicken

  1. Pour some oil into a frying surface that won’t stick. Warm it slowly on the stove until ready.
  2. Turn the chicken after about halfway through a sixto eightminute sear on medium-hot burner flame. Heat it until done, flipping once midway into cooking time that spans roughly between six and eight full minutes.
  3. Every few minutes, give it a mix so it cooks through and turns pale gold on the edges.

Step 4: Cook the Veggies

  1. Heat 1 tsp olive oil. 
  2. Add broccoli, carrots, bell peppers, beans.
  3. Stir-fry for about 4-5 minutes.
  4. Cook them a little bit crispy.

Step 5: Construct the Bowl

  1. Add brown rice to one side of bowl .
  2. Put the cooked chicken next to it.
  3. Add vegs.
  4. Sprinkle with sesame seeds.
  5. Garnish with coriander or spring onion and serve.
  6. Top with freshly squeezed lemon juice.
  7. Add a dollop of Greek yoghurt if you like.

Approximate Nutrition (Per Bowl)

Nutrient Amount
Calories 500–550 kcal
Protein 45–50 g
Carbohydrates 35–40 g
Fat 12–15 g
Fiber 7–9 g

Tips

  1. Try two boiled egg whites if you want more protein, otherwise use 200 g of chicken instead. A different choice might be switching one for the other depending on what suits your meal better.
  2. Try different veggies if you need to – spinach might work, or maybe cabbage. Mushrooms could fit right in. Cauliflower sometimes fills the spot well. Whatever is around usually does fine.
  3. Ready to fuel your day. This bowl supports gaining strength while helping shed extra weight through balanced nutrition. Cook several portions togetherthree or four works well – and store inside the fridge. Keeps fresh for nearly a week without losing quality.

Benefits

Starting strong with lean chicken, this bowl fuels muscles and sustains energy through the day. Fresh veggies bring fiber along with vital nutrients that guard cells. Instead of quick spikes, brown rice gives steady fuel thanks to its slowdigesting carbs. Fullness lasts because each ingredient works in step, not alone. Health thrives when meals like this become routinesimple, rich in what matters. Fitness gains follow naturally when eating stays grounded in real food.

Zero Carb Paneer Salad( Low Carb Lunch) & Carrot ,Green Apple ,Fuji Apple ,Orange Turmeric Juice:

Zero Carb Paneer Salad:

Introduction

Tasty chunks of paneer shine in this crisp salad, ready fast when hunger strikes. Fresh greens snap between bites, bringing color along with good fuel for energy. Protein stands strong here, joined by creamy bits that satisfy without weighing down. A smart choice appears for those skipping heavy carbs at midday. Simple steps lead thereno fuss, just real food on a plate.

Ingredients

  • 200 g paneer, cut into cubes
  • 1 cucumber, chopped
  • A single small head of lettuce, cut into pieces
  • 1 green capsicum, diced
  • One spoon of olive oil
  • ½ teaspoon black pepper
  • Half a teaspoon of cumin that has been roasted and turned into powder
  • Salt to taste
  • One spoon of juice from a lemon

Step 1:Prepare the Paneer

Bite-sized chunks come first when shaping the paneer. Cubes form next, sized just right for eating. Each piece splits off evenly, firm but gentle in hand.

Step 2:Grill the paneer gently

Start by warming a non-stick pan, then toss in the paneer cubes. Cook them two to three minutes per side, flipping once they begin turning golden at the edges. A light crust forms when heat works through slowly. Watch closely so they do not darken too much. The color shift happens quietly, near the end of cooking. Finish when both sides show even warmth with slight browning.

Step 3:Prepare the vegetables

Start by rinsing the cucumber, then cut it into tiny bits. The lettuce followstear it down carefully. After that, slice the capsicum thin. Mix them only when all are ready.

Step 4:Make the dressing

Pour olive oil into a tiny bowl, then add lemon juice right after. Black pepper goes in next, followed by a spoon of roasted cumin powder. Salt lands last, just before stirring begins.

Step 5: Merge All Parts

A handful of grilled paneer goes into the big bowl first. After that, toss in the diced veggies. The two mix easily when combined right away.

Step 6:Toss the Salad

Start by drizzling the dressing across the greens, then lift and turn them slowly so each piece gets a touch of flavor. Finish when every leaf glistens just right.

Step 7: Serve

Right away works best for a light midday meal.

Benefits

  • High in protein from paneer.
  • Low in carbohydrates.
  • Rich in vitamins, minerals, and fiber.
  • Staying satisfied feels easier when your stomach stays busy. Fullness lingers slower through the hours. A steady rhythm keeps hunger at bay without rushing back.
  • Ready in a flash, just toss it together.

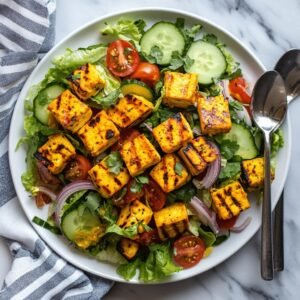
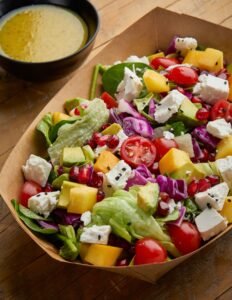
Colorful mixed salad with fresh vegetables, cheese, and dressing in a paper bowl, ideal for healthy eating.Conclusion

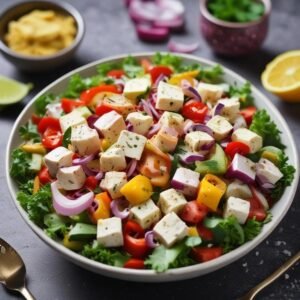
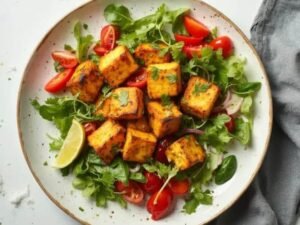
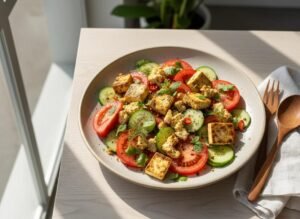
Built around soft paneer cubes, this cool salad brings together crisp greens with creamy texture. Instead of heavy carbs, it leans on avocado slices plus seeds for staying power. Bright lemon dressing lifts every bite, making it light but filling. When hunger hits midday, this plate keeps things steady without weighing you down. Flavor stays clean, ingredients stay simpleno fuss, just balance.


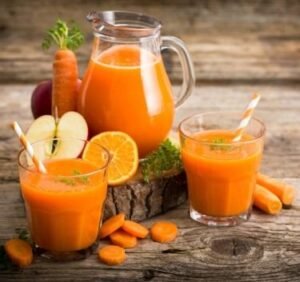
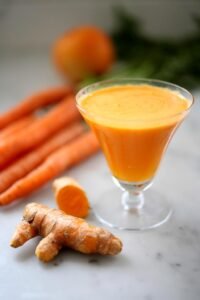
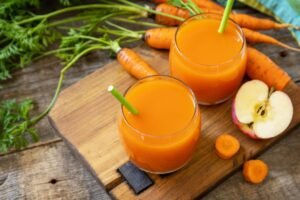
Carrot, Green Apple ,Fuji Apple, Orange, Turmeric Juice:

Introduction

Bright and crisp, this drink fits right into your midday break, giving you steady fuel along with fluids and key nutrients. Carrots meet green apple, then blend into Fuji apple, each layer folding in with orange and a hint of turmeric. Sweetness tangles with tangy notes, forming a taste that lingers without overpowering. Hidden inside are antioxidants, a boost of vitamin C, plus plenty of beta-carotene – all working quietly behind the scenes to keep things running smoothly.

Ingredients

  • Two averagesized carrots, skin removed before cutting into pieces
  • A single green apple cut into pieces
  • A single Fuji apple gets cut into pieces
  • Peel two oranges first. Next comes removing every seed. That step finishes the prep work here
  • Grate a half-teaspoon of fresh turmeric, though powdered worksjust use a quarter-teaspoon instead
  • 1 cup cold water
  • Ice cubes (optional)

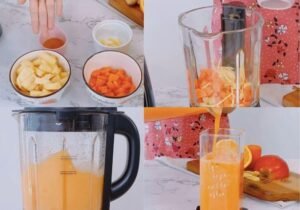
Step 1:Wash and prepare ingredients

Start by rinsing every fruit and vegetable under clean water. Next, remove the outer layer of carrots, oranges, and raw turmeric using a peeler. After that, slice both carrots and apples into tiny chunks before moving on.

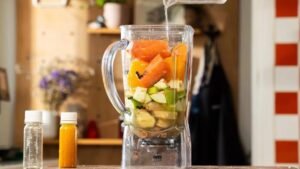
Step 2:Add to Blender

Start by adding the diced carrots to the blender, followed by a green apple alongside a Fuji apple. Next comes the oranges, tossed in one after another. Toss in a pinch of turmeric just before pouring cold water down the sides. The liquid should sit at the bottom once everything else is inside.

Step 3: Blend

Pour everything into the blender. One minute might do it, though sometimes two feels right. Watch how it comes togetherliquid, even, no lumps. The motion pulls each part into the next. Smoothness shows when light reflects off the surface. It is ready once it flows without catching.

Step 4:Strain if desired

Try pushing it through a fine strainer if you like things smooth. Skip that step when more texture and natural goodness matter to you.

Step 5: Serve

Fill a glass, toss in some ice if you feel like it, then drink right away.

Benefits

  • Bright orange roots feed your eyes with a plant pigment that turns into vitamin A.
  • Green Apple adds fiber and antioxidants.
  • Apples of the Fuji kind bring a taste that’s sweet without trying. Energy comes through each bite, quiet and steady.
  • Loaded with vitamin C, orange helps the body stay strong. Its bright flesh fuels natural defenses.
  • Curcumin shows up in turmeric, bringing actions that fight oxidation along with calming inflammation.

Final Sip

Start sipping this bright drink alongside your midday meal, getting a lively lift without slowing down. When made right now, it keeps its zingfueling those later hours with quiet strength.

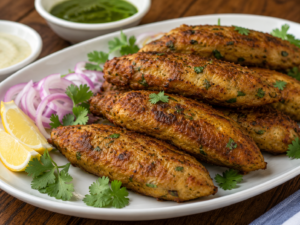
Zero-Carb Fish Kebab & Protein Shake  Lunch Combo: The Ultimate Weight Loss Meal

Introduction

Start strong with a dish that fuels your goalstry these grilled fish kebabs paired with a creamy protein drink. Not only does the seafood deliver clean protein, but it also skips the carbs entirely. Spiced just right, each bite stays light yet filling. Instead of heavy starches, this combo leans on quality ingredients to power through hunger. Experts often highlight fish as a top pickit packs vital nutrients without extra calories. Fullness meets function here, one savory chunk at a time. Start strong with this mix if your goal is cutting carbs or just eating cleaner. Maybe after exercise works bestgives energy without weighing you down. Some find it fits neatly into midday meals, others prefer it quiet at night. Preparation takes little time, yet delivers plenty of useful nutrients. Balance matters when managing weight, and this option helps keep things steady. 

Menu 

  1. Zero-Carb Fish Kebab 
  2. High-Protein Weight Loss Shake

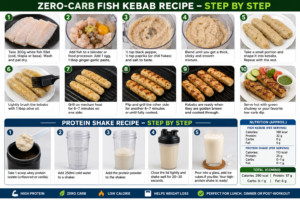
1.Zero-Carb Fish Kebab 

Ingredients 

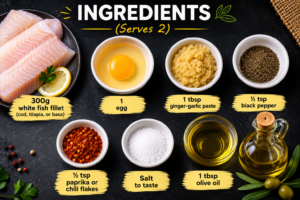
  1. (Serves 2) 300g white fish fillet (cod, tilapia, or basa)
  2.  1 egg
  3.  1 tbsp ginger-garlic paste
  4. ½  tsp black pepper 
  5. ½ tsp paprika or chili flakes
  6.  Salt to taste
  7.  1 tbsp olive oil 

Method 

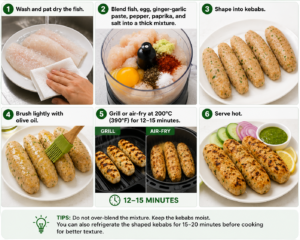
  • Wash and pat dry the fish. 
  • Blend fish, egg, ginger-garlic paste, pepper, paprika, and salt into a thick mixture.
  •  Shape into kebabs.
  • Brush lightly with olive oil.
  • Grill or air-fry at 200C (390F) for 12-15 minutes.
  •  Serve hot. 

Nutrition (Approx. Per serving) :

Calories: 180 

Protein: 32g 

Carbs: 0g 

Fat: 5g

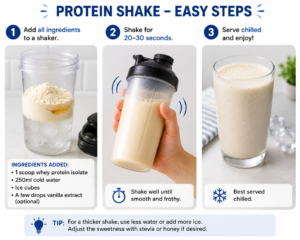
2 .Protein Shake 

Ingredients

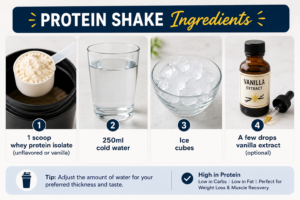
  1.  1 scoop whey protein isolate (unflavored or vanilla)
  2.  250ml cold water
  3. Ice cubes
  4.  A few drops vanilla extract (optional)

 Method 

  • Add all ingredients to a shaker
  •  Shake for 20-30 seconds.
  • Serve chilled.

Nutrition (Approx.)

Calories: 110

 Protein: 25g

 Carbs: 0-0.3g

 Fat: 0-1g 

Why This Combo Helps Weight Loss 

This zero-carb fish kebab and protein shake combo is rich in lean protein, which helps control hunger, preserve muscle mass, and support fat loss. The meal is low in calories yet filling, making it ideal for lunch, dinner, or a post-workout meal.

High protein intake can also boost metabolism and improve recovery while following a weight-loss diet.

Total Nutrition of the Lunch Combo (Approx.)

Calories: 290

 Protein: 57g 

Carbs: 0-0.3g

Fat: 6g


Weight Loss Dinner Recipe

Paneer Kababs + Protein Shake

Introduction

This Weight Loss Dinner Combo is really good for you it has a lot of protein. Is easy to eat. The paneer kababs have protein and fiber from the vegetables. The protein shake helps you feel full for a long time. This dinner is great for people who want to lose weight without eating food.

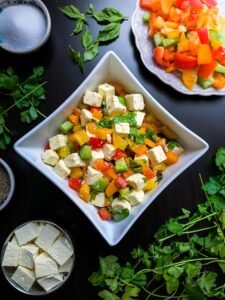
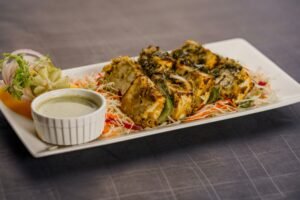
Succulent herb-crusted paneer tikka served with chutney and salad on a stylish plate.

1.Weight Loss Paneer Kababs

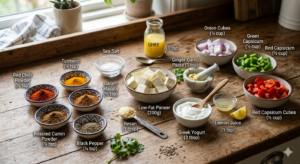
Ingredients

  1. Low-fat paneer: 200 g
  2. curd or Greek yogurt: 3 tbsp
  3. Besan: 1 tbsp
  4. Ginger-garlic paste: 1 tsp
  5. Lemon juice: 1 tsp
  6. Red chilli powder: ½ tsp
  7. Turmeric powder: ¼ tsp
  8. Garam masala: ½ tsp
  9. Roasted cumin powder: ½ tsp
  10. Black pepper: ¼ tsp
  11. Salt: as needed
  12. Onion cubes: ½ cup
  13. Green capsicum cubes: ½ cup
  14. Red capsicum cubes: ½ cup
  15. Oil or ghee: 1 tsp only

Step-by-Step Recipe

Step 1: Cut the Weight Loss Paneer Kababs ingredients

Cut the paneer into medium cubes. Cut the onion, green capsicum and red capsicum into pieces.

Step 2: Make the marinade for the Weight Loss Paneer Kababs

In a bowl add curd, besan, ginger-garlic paste, lemon juice, red chilli powder, turmeric, garam masala, cumin powder, black pepper and salt.

Mix everything well. Make a smooth thick paste.

Step 3: Add the paneer and vegetables to the marinade for the Weight Loss Paneer Kababs

Add the paneer cubes, onion, green capsicum and red capsicum into the marinade.

Mix gently so the paneer does not break.

Step 4: Marinate the Weight Loss Paneer Kababs

Keep it aside for 20–30 minutes.

For taste refrigerate for 1 hour.

Step 5: Put the Weight Loss Paneer Kababs on skewers

Arrange the paneer and vegetables on skewers.

For example:

Paneer → Capsicum → Onion → Paneer → Red Capsicum → Paneer

Step 6: Cook the Weight Loss Paneer Kababs

Heat a -stick tawa. Brush 1 tsp oil or ghee.

Cook the Weight Loss Paneer Kababs on low-medium flame for 8–10 minutes. Turn them slowly from all sides until golden.

You can also cook in an air fryer at 180°C for 10–12 minutes.

Step 7: Serve the Weight Loss Paneer Kababs

Sprinkle lemon juice and chaat masala on top. Serve hot with chutney and salad.

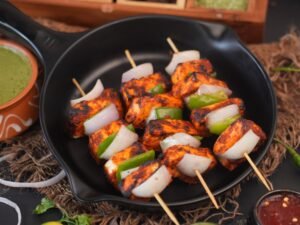
Close-up of grilled paneer skewers with bell peppers and onions on black plate.Man presenting a protein shake in a plastic tumbler against a blurred nature background.

2.Weight Loss Protein Shake

Ingredients

  1. fat milk or almond milk: 1 cup
  2. Protein powder: 1 scoop
  3. Banana,Apple: ½, optional
  4. Chia seeds: 1 tsp
  5. Cinnamon powder: ¼ tsp
  6. Ice cubes: optional
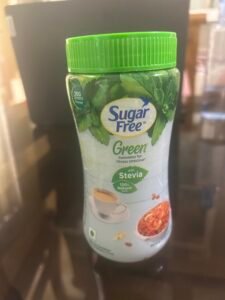
  7. Sugar free,jagre powder

Step-by-Step Recipe

Step 1: Add milk to the Weight Loss Protein Shake

Take 1 cup low-fat milk or almond milk in a blender.

Step 2: Add protein powder to the Weight Loss Protein Shake

Add 1 scoop protein powder.

Step 3: Add ingredients to the Weight Loss Protein Shake

Add ½ banana,apple, chia seeds and cinnamon powder.

Step 4: Blend the Weight Loss Protein Shake

Blend everything for 30–40 seconds until smooth.

Step 5: Serve the Weight Loss Protein Shake

Pour into a glass. Drink fresh. Do not add sugar.

Close-up of a smiling woman enjoying a brown drink from a glass indoors. Relaxed and cozy vibe.

Dinner Plate Combination For one Weight Loss Dinner:

  • 4–5 Weight Loss Paneer Kabab pieces
  • 1 bowl salad
  • 1 glass Weight Loss Protein Shake
  • Green chutney

Approx Nutrition

  • Calories: 400–500 kcal
  • Protein: 35–45 g
  • Carbs: Low
  • Fat: Controlled
  • time: Dinner or post-workout dinner

Conclusion

Weight Loss Paneer Kababs with Weight Loss Protein Shake is a perfect Weight Loss Dinner because it is high in protein filling, tasty and low in oil. It helps reduce cravings and keeps you satisfied without calories. This Weight Loss recipe is simple, healthy and ideal, for anyone who wants to lose weight while enjoying food.

Weight Loss Chicken Tikki Recipe

Chicken tikki is a delicious and healthy meal that is made with lean chicken, aromatic spices and fresh herbs. It is a great source of high quality protein, making it a perfect choice for fitness enthusiasts, weight loss diets and healthy family meals. Chicken Tikki Unlike deep-fried snacks, chicken tikki can be grilled or pan-cooked with very little oil, which makes it light and nutritious. It is a popular appetizer or snack due to its rich flavor, soft texture and nutritional benefits. Whether you’re after a quick meal or an evening snack packed with protein, chicken tikki is a tasty way to help you live a balanced and healthy life.

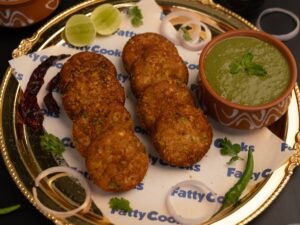
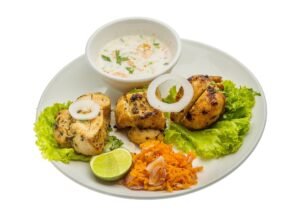
Crispy Indian fritters served with mint chutney on a decorative plate.

Advantages of Consuming Chicken Tikki

Chicken tikki is a healthy and protein-rich food that can aid in weight management and overall wellness. Made with lean chicken breast, it provides high quality protein to help build and repair muscles, and helps you stay fuller for longer. It can help control calorie intake and reduce unnecessary snacking. Chicken tikki is also low on carbohydrates so it is good for the people on a balanced diet. It contains important nutrients like B vitamins, phosphorus and selenium that help with energy production and immunity. You can grill or pan-fry chicken tikki with little or no oil to create a nutritious, delicious and filling meal.

Benefits for Weight Loss:
1.Protein rich
2.Low carbohydrate
3.Helps you stay full longer
4.Helps to keep muscles when losing weight

Nutrition (per serving) Estimate:

.Calories: 180-220 cal
.Protein: 28–32 g
.Carbohydrates: 3-5 g
.Fat: 5-7 g


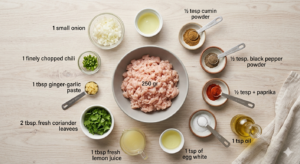
Ingredients:
.250 g boneless chicken breast

.minced 1 small onion

.finely chopped 1 green chili

.finely chopped 1 tbsp ginger-garlic paste

.2 tbsp fresh coriander leaves

.chopped ½ tsp cumin powder

.½ tsp black pepper powder

.½ tsp paprika or red chili powder

.½ tsp salt or to taste

.1 tbsp lemon juice

.1 egg white, optional for binding

.1 tsp olive oil

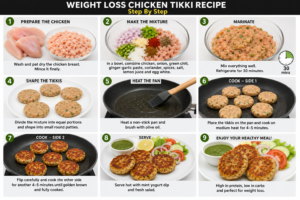
Step by step recipe:

Step 1: Prepare the Chicken Wash and pat dry the chicken breast. Mince it finely or grind it in a food processor.

Step 2: Make the Mixture In a bowl, combine chicken, onion, green chili, ginger-garlic paste, coriander leaves, cumin powder, black pepper, paprika, salt, lemon juice, and egg white.

Step 3: Marinate Mix well and refrigerate for 30 minutes.

Step 4: Shape the Tikkis Divide the mixture into equal portions and shape it into small round patties.

Step 5: Cook Heat a non-stick pan and brush it with olive oil. Cook the tikkis for 4 to 5 minutes on each side until golden brown and fully cooked.

Step 6: Serve Serve hot with mint yogurt dip and fresh salad.


Conclusion:

This healthy chicken tikki is a tasty protein rich snack or meal that will help you with your weight management and keep you full and energized.


Multi Grain Ajwain, Chana Sattu & Brahmi(bacopa) Leaves Paratha Recipe

Multigrain Paratha with Chana Sattu and Brahmi Leaves is a healthy nutrient-rich meal that helps kids grow and helps seniors maintain energy, digestion, and cognitive health. It is a tasty way to have healthy grains, protein and herbs in the diet on a daily basis.

Multigrain Paratha with Chana Sattu and Brahmi (Bacopa) Leaves Benefits for Children and senior citizens:

This healthy paratha is loaded with protein, fiber, vitamins and minerals and makes a wholesome meal for children and senior citizens.

Indian paratha served with chutneys and masala chai, perfect for a hearty meal.

Children:                                                                                                                                                      1.Encourages growth and development with chana sattu protein.
2.Whole grain flour for long-lasting energy for active kids.
3.Brahmi leaves boost brain function and memory.
4.Aids the digestion process with dietary fiber.
5.Boosts immunity with essential vitamins and antioxidants.

Senior citizens:
1.Plant based protein from sattu supports muscle health.
2.Supports healthy digestion and helps to prevent constipation.
3.May help with memory and cognitive function with Brahmi.
4.Multigrains’ complex carbohydrates help to support steady energy levels.
5.Essential nutrients for good health and well-being.

Golden brown paratha being cooked on a skillet, showcasing traditional flatbread preparation.

Here is the step by step recipe

Ingredients (to make 4 Parathas)
. 2 cups flour (multigrain)
. ½ cup roasted gram flour (chana sattu)
.1 cup Brahmi leaves (washed and chopped finely)
. 1 tsp ajwain (carom seeds)
  .1 small onion, finely chopped (optional)
.1 green chili, chopped finely
.Turmeric powder ½ tsp
.½ tsp cumin powder.
.Season to taste with salt
.1 tbsp lemon juice
  .Warm water as needed
.2 tsp oil for dough.
.Ghee or oil for roasting

How to make this paratha:

 step 1  is to prepare the dough:

 .Take the multigrain flour, 1 tsp salt, ajwain, and 2 tsp of oil in a bowl.

 .Slowly add warm water until you have a soft dough.

 .Knead until you form a soft dough.

 .Cover with the lid and let it rest for 15 minutes.

Step 2  is to prepare the filling:

 .In another bowl, take chana sattu, finely chopped Brahmi leaves, onion, green chili, turmeric, cumin     powder, lemon juice and salt.

 .Mix well.

 .Sprinkle 1-2 tbsp water if mixture feels too dry.

Step 3  is to stuff the paratha:

Make small balls out of the dough, roll into a small circle and place the stuffing. Gather the edges and shape it into a paratha.

Step 4  is to cook the paratha:

Heat the tawa and roll each paratha and cook. Apply oil or ghee.

Step 5  is serving:

Serve hot with yogurt, pickle, or mint chutney.

This healthy paratha is an Indian bread made with mixed grains, chana sattu (rich in proteins) and Brahmi leaves. It is a very nutritious breakfast or lunch and provides good amount of protein, fiber and other nutrients.


Refreshing Cucumber & Hygrophila (Khulekhara) Green Juice for Daily Health

Cucumber and Hygrophila (Khulekhara) green juice is a refreshing drink packed with natural nutrients. Cucumber provides hydration and antioxidants, while Khulekhara is traditionally known for its iron-rich properties and health benefits. This simple juice can support digestion, help maintain healthy hemoglobin levels, and promote overall wellness. A splash of lemon adds vitamin C and enhances the flavor. Easy to prepare and naturally low in calories, this green juice is an excellent addition to a healthy lifestyle. Enjoy it fresh in the morning to start your day with a nourishing and energizing boost.

Advantages

✅ Packed with antioxidants
✅ Helps to keep the body hydrated
✅ Helps with digestion
✅ Promotes healthy hemoglobin levels                                                                                                                  ✅ Refreshing and low in calories


Cucumber & Hygrophila (Khulekhara) Green Juice Recipe Ingredients🥒🍃 
1. 1,2 cucumber
2. Hygrophila (Khulekhara) fresh leaves 10-12
3.juice of lemon 1 tsp
4.1 cup cold water
5.4–5 mint leaves (optional)
6.½ green apple (optional, for sweetness)

Vibrant green vegetable smoothie in a clear glass, ideal for a healthy, refreshing drink.


Step by step recipe:-

Step 1: Rinse the Ingredients

Wash the cucumber and Hygrophila leaves thoroughly in running water, to remove dirt and impurities.

Step 2: Slice the Cucumber

Chop the cucumber into small chunks. Leave the peel on for added nutrients.

Step 3: Get the Leaves Ready

Take the thick stems off the Hygrophila leaves and keep only the tender leaves.

Step 4: Import into Blender

Hygrophila leaves, Cucumber pieces. Optional: Apple and mint leaves. Place all ingredients in a blender and mix.

Step 5:Mix well

Blend for 1-2 minutes, until the mixture is smooth and bright green.

Step 6: Strain (Optional)

For a smoother texture, you can strain the juice through a fine sieve or cheesecloth.

Step 7:Squeeze in Lemon Juice

Add the lemon juice and mix thoroughly.

Step 8: Serve Fresh

Pour into glass and serve immediately. Add ice cubes if you like.

 Cucumber and Hygrophila (Khulekhara) green juice is a simple, refreshing drink that’s packed with hydration, antioxidants, and natural nutrients. Regular enjoyment can help promote overall wellness and give a healthy start to your day. 🍃🥒🥤


Green Moong Dal Paneer Tikki

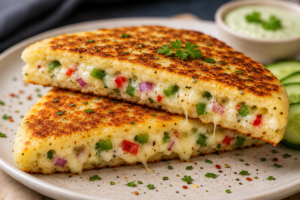
Healthy eating without sacrificing taste.Green Moong Dal with Paneer Tikki is delicious, healthy and protein rich snack and is perfect for breakfast, evening tea or light meal. These crispy tikkis are nutritious and flavorful with soaked green moong dal, fresh paneer, onions, herbs and spices. Green moong dal adds plant-based protein and fibre and paneer adds calcium and extra protein. The tikkis are shallow fried golden brown for a crunchy exterior and soft interior. Serve them hot with a mint chutney or a yogurt dip for a tasty treat. This is a simple recipe that allows you to eat.

Here is a step by step recipe of delicious Green Moong Dal Paneer Tikkis with images at each stage of the process.

This recipe will make about 10 to 12 medium sized tikkis.
Ingredients

• 1 cup green moong dal (soak overnight or minimum 4 hours)
• 100g grated paneer
• 1 small onion, chopped fine
• 1-2 green chillies, finely chopped
• 1-inch piece grated ginger
• 2 tablespoons chopped fresh coriander leaves

• 2 tbsp besan (gram flour), dry roasted

• 1 tsp cumin seeds
• 1 tsp Chaat Masala
• Half tsp turmeric powder
• ½ tsp red chili powder (optional)
• Salt to taste
• 2-3 tablespoons oil for shallow frying

Step-by-Step Instructions

Step 1: Prepare the Base Mixture

The first step is creating the flavorful base. After soaking the green moong dal, drain the water completely. Grind the soaked dal into a coarse paste without adding much water. In a large bowl, combine this dal paste with the grated paneer, chopped onions, green chilies, ginger, and fresh coriander.

Step 2: Bind and Season

To make sure the tikkis hold their shape, we add a binding agent and spices. To the bowl (referencing the mixture seen in Image 1), add the roasted besan (gram flour), cumin seeds, chaat masala, turmeric powder, and salt. Mix everything together well until it forms a uniform dough-like consistency. The besan helps absorb excess moisture.

Step 3: Shape the Tikkis                                    

Now it is time to form the patties. Grease your palms lightly with oil. Take a small portion of the final mixture (the seasoned dough formed in Step 2) and roll it into a ball. Flatten it gently between your palms to form a round, flat patty (tikki). Shape all the mixture into tikkis of uniform size and place them on a tray.

Step 4: Shallow Fry until Golden

The final step is to cook the tikkis. Heat 2-3 tablespoons of oil in a flat non-stick pan over medium heat. Gently place the shaped tikkis (from Step 3) onto the hot pan. Shallow fry them for 3-4 minutes on one side until they turn golden brown. Flip them carefully and cook the other side until it is equally golden and crispy. Repeat for all tikkis.

Your delicious Green Moong Dal Paneer Tikkis are ready! Serve them hot with mint chutney or tomato ketchup.